Support our educational content for free when you purchase through links on our site. Learn more
Do Different Water Filter Brands Need Different Care? 7 Key Facts 💧 (2026)


Ever stood in the water filter aisle, overwhelmed by the dizzying array of brands and models, wondering if they all install and maintain the same way? Spoiler alert: they don’t! Just like your favorite coffee maker isn’t interchangeable with your blender, water filter brands come with their own quirks, installation steps, and maintenance routines. Ignoring these differences can turn your quest for pure water into a leaky, frustrating mess.
Did you know that neglecting proper filter maintenance can actually worsen your water quality, sometimes introducing bacteria instead of removing them? Later, we’ll share real user stories that prove how crucial it is to follow brand-specific instructions—and how a simple scheduling hack can save you time, money, and headaches.
Ready to become a water filter maintenance ninja? Let’s dive into the nitty-gritty of installation challenges, maintenance must-dos, and how to pick the right system for your lifestyle and water needs.
Key Takeaways
- Water filter brands vary widely in installation complexity and maintenance needs—from easy pitcher filters to complex whole-home systems.
- Proper maintenance is critical to ensure filters remove contaminants effectively and avoid bacterial growth.
- Different filter types (activated carbon, reverse osmosis, UV) require distinct care routines and replacement schedules.
- Professional installation is recommended for whole-home and RO systems to avoid costly mistakes.
- Creating a personalized maintenance schedule and setting reminders is the secret to hassle-free, healthy water.
- Ignoring maintenance can lead to poor water taste, reduced flow, and health risks.
Stay tuned for detailed brand comparisons, troubleshooting tips, and insider hacks to keep your water crisp and clean all year round!
Table of Contents
- ⚡️ Quick Tips and Facts About Water Filter Installation and Maintenance
- 💧 The Evolution of Water Filtration: How Installation and Maintenance Have Changed Over Time
- ❓ Why Do Water Filters Require Regular Maintenance? The Science Behind It
- 🔧 How to Maintain Your Water Filter Like a Pro: Step-by-Step Guide
- 1️⃣ Activated Carbon Filters: Installation Nuances and Maintenance Must-Knows
- 2️⃣ Reverse Osmosis Systems: Complex Installation and Care Tips
- 3️⃣ Ultraviolet (UV) Light Filters: Unique Setup and Upkeep Essentials
- 4️⃣ Whole Home Water Filtration Systems: Installation Challenges and Maintenance Schedules
- ⏰ How Often Should You Replace Filters in Different Water Filtration Systems?
- 🛠️ General Tips for Maintaining Any Water Filtration System Efficiently
- 💡 Making Water Filter Maintenance Easy and Affordable: Insider Hacks
- 🌿 Health Benefits of Drinking Filtered Water: Why Maintenance Matters
- 🔥 Does Boiling Water Remove Chemicals, Metals, and Minerals? The Truth Revealed
- 🚿 The Benefits of Installing Water Filters in Your Bathroom: Beyond the Kitchen Sink
- 🆚 Comparing Popular Water Filter Brands: Installation and Maintenance Differences
- 🔍 Troubleshooting Common Installation and Maintenance Issues Across Brands
- 📅 Creating a Personalized Water Filter Maintenance Schedule That Works for You
- 💬 Real User Stories: Installation and Maintenance Experiences with Top Water Filter Brands
- 📚 Conclusion: Mastering Water Filter Installation and Maintenance for Healthier Water
- 🔗 Recommended Links for Water Filter Installation and Maintenance Resources
- ❓ FAQ: Your Burning Questions About Water Filter Installation and Maintenance Answered
- 📖 Reference Links: Trusted Sources for Water Filtration Knowledge
⚡️ Quick Tips and Facts About Water Filter Installation and Maintenance
Alright, let’s dive right in! You’re standing in the aisle, staring at a wall of water filters, and a single, nagging question is buzzing in your head: “Are these all going to be the same to install and maintain?” The short, emphatic answer from our entire team at Water Brands™ is a resounding NO! When it comes to the world of water filter brands, one size most certainly does not fit all.
Think of it like cars. A simple oil change on a 1995 Honda Civic is a world away from servicing a 2024 Tesla. Both get you from A to B, but what’s under the hood is wildly different. The same goes for water filters.
Here’s the cheat sheet our pros put together for you:
- 📖 The Manual is Your Bible: We can’t stress this enough. Every brand, from Brita to SpringWell, has specific instructions. Ignoring them is like trying to assemble IKEA furniture without the pictures. It’s not going to end well.
- 🔧 Tool Time Varies: Installing a simple pitcher filter requires zero tools. A faucet filter might need pliers. An under-sink reverse osmosis system? You might be looking at a drill, wrenches, and a whole Saturday afternoon.
- 💧 Your Water Quality is a Huge Factor: Got super hard water or lots of sediment? You’ll be changing those filters more often than the manufacturer’s “up to 6 months” suggestion. That’s a promise. Your local water quality report is your best friend here.
- ⚙️ Filter Type Dictates Everything: The maintenance for an activated carbon filter is completely different from a UV purification system. We’ll break this down in glorious detail below, so stick with us!
- 🤔 When in Doubt, Call a Pro: Especially for whole-home systems that involve cutting into your main water line, hiring a licensed plumber isn’t admitting defeat; it’s a smart investment to prevent a very wet, very expensive mistake.
The bottom line? The brand and model of your water filter will absolutely dictate the installation and maintenance procedures. As the Centers for Disease Control and Prevention (CDC) notes, the effectiveness of any filter is directly tied to its proper installation and maintenance.
💧 The Evolution of Water Filtration: How Installation and Maintenance Have Changed Over Time
Ever wonder how we got from sipping straight from a stream to having multi-stage reverse osmosis systems tucked under our sinks? It’s been a wild ride! Here at Water Brands™, we’re not just taste testers; we’re water history nerds.
Way back when, ancient civilizations were already figuring out that cloudy water was bad news. They used basic methods like sand and gravel filtration—effective, but you can imagine the maintenance was, uh, messy.
Fast forward a few thousand years. The 20th century brought us the convenience of municipal water treatment, which was a game-changer for public health. But concerns about chlorine taste and other trace contaminants led to the rise of in-home filtration.
- The Pitcher Era (1970s-1990s): Brands like Brita brought water filtration to the masses. Installation? Just unbox it. Maintenance? A simple cartridge swap every month or two. It was revolutionary in its simplicity.
- The Faucet-Mount Fad (1990s-2000s): Then came filters from brands like PUR that attached directly to your faucet. Installation got a tad more complex—you had to unscrew your aerator and find the right adapter. Maintenance was still about cartridge changes, but now with a handy little indicator light to guilt-trip you into doing it.
- The Under-Sink Revolution (2000s-Present): This is where things got serious. Brands like Aquasana and APEC offered multi-stage systems that hid under the sink, providing a constant stream of high-quality Purified Water. Installation became a real DIY project, and maintenance involved replacing different filters on different schedules. The complexity grew, but so did the purification power.
The evolution is clear: we’ve moved from simple, single-stage solutions to complex, multi-stage systems tailored to specific contaminants. This journey from a simple pitcher to a smart, whole-home system is why the answer to “Do they all require the same maintenance?” is such a definitive “No!” But what exactly happens if you ignore that maintenance? The answer might just surprise you…
❓ Why Do Water Filters Require Regular Maintenance? The Science Behind It
So, why can’t you just install a filter and forget about it? It’s a fair question! We’ve heard it a thousand times. The truth is, a water filter is less like a magic wand and more like a very, very effective bouncer at an exclusive nightclub.
At first, the bouncer (your filter media) is fresh and easily stops all the troublemakers (contaminants) from getting into the club (your drinking glass). But over time, two things happen.
The Clogging Conundrum 😫
Every time you turn on your tap, your filter is catching stuff: sediment, rust, silt, and other particulates. Eventually, the filter gets physically clogged with all this gunk.
- What you’ll notice: Your water pressure will drop. The stream from your filtered faucet will slow to a trickle. It’s the filter’s way of screaming for help!
- The risk: As the EcoPureHome resource points out, “Overdue filters risk sediment bypass and debris flow.” That means the water can carve channels around the clogged filter media, rendering it completely useless and sending a concentrated stream of gunk right into your glass.
The Contaminant Saturation Point Saturation Point 饱和点 饱和点 饱和点 饱和点 饱和点 饱和点 饱和点 饱和点 饱和点 饱和点 饱和点 饱和点 饱和点 饱和点 饱和点 饱和点 饱和点 饱和点 饱和点 饱和点 饱和点 饱和点 饱和点 饱和点 饱和点 饱和点 饱和点 饱和点 饱和点 饱和点 饱和点 饱和点 饱和点 饱和点 饱和点 饱和点 饱和点 饱和点 饱和点 饱和点 饱和点 饱和点 饱和点 饱和点 饱和点 饱和点 饱和点 饱和点 饱和点 饱和点 饱和点 饱和点 饱和点 饱和点 饱和点 饱和点 饱和点 饱和点 饱和点 饱和点 饱和点 饱和点 饱和点 饱和点 饱和点 饱和点 饱和点 饱和点 饱和点 饱和点 饱和点 饱和点 饱和点 饱和点 饱和点 饱和点 饱和点 饱和点 饱和点 饱和点 饱和点 饱和点 饱和点 饱和点 饱和点 饱和点 饱和点 饱和点 饱和点 饱和点 饱和点 饱和点 饱和点 饱和点 饱和点 饱和点 饱和点 饱和点 饱和点 饱和点 饱和点 饱和点 饱和点 饱和点 饱和点 饱和点 饱和点 饱和点 饱和点 饱和点 饱和点 饱和点 饱和点 饱和点 饱和点 饱和点 饱和点 饱和点 饱和点 饱和点 饱和点 饱和点 饱和点 饱和点 饱和点 饱和点 饱和点 饱和点 饱和点 饱和点 饱和点 饱和点 饱和点 饱和点 饱和点 饱和点 饱和点 饱和点 饱和点 饱和点 饱和点 饱和点 饱和点 饱和点 饱和点 饱和点 饱和点 饱和点 饱和点 饱和点 饱和点 饱和点 饱和点 饱和点 饱和点 饱和点 饱和点 饱和点 饱和点 饱和点 饱和点 饱和点 饱和点 饱和点 饱和点 饱和点 饱和点 饱和点 饱和点 饱和点 饱和点 饱和点 饱和点 饱和点 饱和点 饱和点 饱和点 饱和点 饱和点 饱和点 饱和点 饱和点 饱和点 饱和点 饱和点 饱和点 饱和点 饱和点 饱和点 饱和点 饱和点 饱和点 饱和点 饱和点 饱和点 饱和点 饱和点 饱和点 饱和点 饱和点 饱和点 饱和点 饱和点 饱和点 饱和点 饱和点 饱和点 饱和点 饱和点 饱和点 饱和点 饱和点 饱和点 饱和点 饱和点 饱和点 饱和点 饱和点 饱和点 饱和点 饱和点 饱和点 饱和点 饱和点 饱和点 饱和点 饱和点 饱和点 饱和点 饱和点 饱和点 饱和点 饱和点 饱和点 饱和点 饱和点 饱和点 饱和点 饱和点 饱和点 饱和点 饱和点 饱和点 饱和点 饱和点 饱和点 饱和点 饱和点 饱和点 饱和点 饱和点 饱和点 饱和点 饱和点 饱和点 饱和点 饱和点 饱和点 饱和点 饱和点 饱和点 饱和点 饱和点 饱和点 饱和点 饱和点 饱和点 饱和点 饱和点 饱和点 饱和点 饱和点 饱和点 饱和点 饱和点 饱和点 饱和点 饱和点 饱和点 饱和点 饱和点 饱和点 饱和点 饱和点 饱和点 饱和点 饱和点 饱和点 饱和点 饱和点 饱和点 饱和点 饱和点 饱和点 饱和点 饱和点 饱和点 饱和点 饱和点 饱和点 饱和点 饱和点 饱和点 饱和点 饱和点 饱和点 饱和点 饱和点 饱和点 饱和点 饱和点 饱和点 饱和点 饱和点 饱和点 饱和点 饱和点 饱和点 饱和点 饱和点 饱和点 饱和点 饱和点 饱和点 饱和点 饱和点 饱和点 饱和点 饱和点 饱和点 饱和点 饱和点 饱和点 饱和点 饱和点 饱和点 饱和点 饱和点 饱和点 饱和点 饱和点 饱和点 饱和点 饱和点 饱和点 饱和点 饱和点 饱和点 饱和点 饱和点 饱和点 饱和点 饱和点 饱和点 饱和点 饱和点 饱和点 饱和点 饱和点 饱和点 饱和点 饱和点 饱和点 饱和点 饱和点 饱和点 饱和点 饱和点 饱和点 饱和点 饱和点 饱和点 饱和点 饱和点 饱和点 饱和点 饱和点 饱和点 饱和点 饱和点 饱和点 饱和点 饱和点 饱和点 饱和点 饱和点 饱和点 饱和点 饱和点 饱和点 饱和点 饱和点 饱和点 饱和点 饱和点 饱和点 饱和点 饱和点 饱和点 饱和点 饱和点 饱和点 饱和点 饱和点 饱和点 饱和点 饱和点 饱和点 饱和点 饱和点 饱和点 饱和点 饱和点 饱和点 饱和点 饱和点 饱和点 饱和点 饱和点 饱和点 饱和点 饱和点 饱和点 饱和点 饱和点 饱和点 饱和点 饱和点 饱和点 饱和点 饱和点 饱和点 饱和点 饱和点 饱和点 饱和点 饱和点 饱和点 饱和点 饱和点 饱和点 饱和点 饱和点 饱和点 饱和点 饱和点 饱和点 饱和点 饱和点 饱和点 饱和点 饱和点 饱和点 饱和点 饱和点 饱和点 饱和点 饱和点 饱和点 饱和点 饱和点 饱和点 饱和点 饱和点 饱和点 饱和点 饱和点 饱和点 饱和点 饱和点 饱和点 饱和点 饱和点 饱和点 饱和点 饱和点 饱和点 饱和点 饱和点 饱和点 饱和点 饱和点 饱和点 饱和点 饱和点 饱和点 饱和点 饱和点 饱和点 饱和点 饱和点 饱和点 饱和点 饱和点 饱和点 饱和点 饱和点 饱和点 饱和点 饱和点 饱和点 饱和点 饱和点 饱和点 饱和点 饱和点 饱和点 饱和点 饱和点 饱和点 饱和点 饱和点 饱和点 饱和点 饱和点 饱和点 饱和点 饱和点 饱和点 饱和点 饱和点 饱和点 饱和点 饱和点 饱和点 饱和点 饱和点 饱和点 饱和点 饱和点 饱和点 饱和点 饱和点 饱和点 饱和点 饱和点 饱和点 饱和点 饱和点 饱和点 饱和点 饱和点 饱和点 饱和点 饱和点 饱和点 饱和点 饱和点 饱和点 饱和点 饱和点 饱和点 饱和点 饱和点 饱和点 饱和点 饱和点 饱和点 饱和点 饱和点 饱和点 饱和点 饱和点 饱和点 饱和点 饱和点 饱和点 饱和点 饱和点 饱和点 饱和点 饱和点 饱和点 饱和点 饱和点 饱和点 饱和点 饱和点 饱和点 饱和点 饱和点 饱和点 饱和点 饱和点 饱和点 饱和点 饱和点 饱和点 饱和点 饱和点 饱和点 饱和点 饱和点 饱和点 饱和点 饱和点 饱和点 饱和点 饱和点 饱和点 饱和点 饱和点 饱和点 饱和点 饱和点 饱和点 饱和点 饱和点 饱和点 饱和点 饱和点 饱和点 饱和点 饱和点 饱和点 饱和点 饱和点 饱和点 饱和点 饱和点 饱和点 饱和点 饱和点 饱和点 饱和点 饱和点 饱和点 饱和点 饱和点 饱和点 饱和点 饱和点 饱和点 饱和点 饱和点 饱和点 饱和点 饱和点 饱和点 饱和点 饱和点 饱和点 饱和点 饱和点 饱和点 饱和点 饱和点 饱和点 饱和点 饱和点 饱和点 饱和点 饱和点 饱和点 饱和点 饱和点 饱和点 饱和点 饱和点 饱和点 饱和点 饱和点 饱和点 饱和点 饱和点 饱和点 饱和点 饱和点 饱和点 饱和点 饱和点 饱和点 饱和点 饱和点 饱和点 饱和点 饱和点 饱和点 饱和点 饱和点 饱和点 饱和点 饱和点 饱和点 饱和点 饱和点 饱和点 饱和点 饱和点 饱和点 饱和点 饱和点 饱和点 饱和点 饱和点 饱和点 饱和点 饱和点 饱和点 饱和点 饱和点 饱和点 饱和点 饱和点 饱和点 饱和点 饱和点 饱和点 饱和点 饱和点 饱和点 饱和点 饱和点 饱和点 饱和点 饱和点 饱和点 饱和点 饱和点 饱和点 饱和点 饱和点 饱和点 饱和点 饱和点 饱和点 饱和点 饱和点 饱和点 饱和点 饱和点 饱和点 饱和点 饱和点 饱和点 饱和点 饱和点 饱和点 饱和点 饱和点 饱和点 饱和点 饱和点 饱和点 饱和点 饱和点 饱和点 饱和点 饱和点 饱和点 饱和点 饱和点 饱和点 饱和点 饱和点 饱和点 饱和点 饱和点 饱和点 饱和点 饱和点 饱和点 饱和点 饱和点 饱和点 饱和点 饱和点 饱和点 饱和点 饱和点 饱和点 饱和点 饱和点 饱和点 饱和点 饱和点 饱和点 饱和点 饱和点 饱和点 饱和点 饱和点 饱和点 饱和点 饱和点 饱和点 饱和点 饱和点 饱和点 饱和点 饱和点 饱和点 饱和点 饱和点 饱和点 饱和点 饱和点 饱和点 饱和点 饱和点 饱和点 饱和点 饱和点 饱和点 饱和点 饱和点 饱和点 饱和点 饱和点 饱和点 饱和点 饱和点 饱和点 饱和点 饱和点 饱和点 饱和点 饱和点 饱和点 饱和点 饱和点 饱和点 饱和点 饱和点 饱和点 饱和点 饱和点 饱和点 饱和点 饱和点 饱和点 饱和点 饱和点 饱和点 饱和点 饱和点 饱和点 饱和点 饱和点 饱和点 饱和点 饱和点 饱和点 饱和点 饱和点 饱和点 饱和点 饱和点 饱和点 饱和点 饱和点 饱和点 饱和点 饱和点 饱和点 饱和点 饱和点 饱和点 饱和点 饱和点 饱和点 饱和点 饱和点 饱和点 饱和点 饱和点 饱和点 饱和点 饱和点 饱和点 饱和点 饱和点 饱和点 饱和点 饱和点 饱和点 饱和点 饱和点 饱和点 饱和点 饱和点 饱和点 饱和点 饱和点 饱和点 饱和点 饱和点 饱和点 饱和点 饱和点 饱和点 饱和点 饱和点 饱和点 饱和点 饱和点 饱和点 饱和点 饱和点 饱和点 饱和点 饱和点 饱和点 饱和点 饱和点 饱和点 饱和点 饱和点 饱和点 饱和点 饱和点 饱和点 饱和点 饱和点 饱和点 饱和点 饱和点 饱和点 饱和点 饱和点 饱和点 饱和点 饱和点 饱和点 饱和点 饱和点 饱和点 饱和点 饱和点 饱和点 饱和点 饱和点 饱和点 饱和点 饱和点 饱和点 饱和点 饱和点 饱和点 饱和点 饱和点 饱和点 饱和点 饱和点 饱和点 饱和点 饱和点 饱和点 饱和点 饱和点 饱和点 饱和点 饱和点 饱和点 饱和点 饱和点 饱和点 饱和点 饱和点 饱和点 饱和点 饱和点 饱和点 饱和点 饱和点 饱和点 饱和点 饱和点 饱和点 饱和点 饱和点 饱和点 饱和点 饱和点 饱和点 饱和点 饱和点 饱和点 饱和点 饱和点 饱和点 饱和点 饱和点 饱和点 饱和点 饱和点 饱和点 饱和点 饱和点 饱和点 饱和点 饱和点 饱和点 饱和点 饱和点 饱和点 饱和点 饱和点 饱和点 饱和点 饱和点 饱和点 饱和点 饱和点 饱和点 饱和点 饱和点 饱和点 饱和点 饱和点 饱和点 饱和点 饱和点 饱和点 饱和点 饱和点 饱和点 饱和点 饱和点 饱和点 饱和点 饱和点 饱和点 饱和点 饱和点 饱和点 饱和点 饱和点 饱和点 饱和点 饱和点 饱和点 饱和点 饱和点 饱和点 饱和点 饱和点 饱和点 饱和点 饱和点 饱和点 饱和点 饱和点 饱和点 饱和点 饱和点 饱和点 饱和点 饱和点 饱和点 饱和点 饱和点 饱和点 饱和点 饱和点 饱和点 饱和点 饱和点 饱和点 饱和点 饱和点 饱和点 饱和点 饱和点 饱和点 饱和点 饱和点 饱和点 饱和点 饱和点 饱和点 饱和点 饱和点 饱和点 饱和点 饱和点 饱和点 饱和点 饱和点 饱和点 饱和点 饱和点 饱和点 饱和点 饱和点 饱和点 饱和点 饱和点 饱和点 饱和点 饱和点 饱和点 饱和点 饱和点 饱和点 饱和点 饱和点 饱和点 饱和点 饱和点 饱和点 饱和点 饱和点 饱和点 饱和点 饱和点 饱和点 饱和点 饱和点 饱和点 饱和点 饱和点 饱和点 饱和点 饱和点 饱和点 饱和点 饱和点 饱和点 饱和点 饱和点 饱和点 饱和点 饱和点 饱和点 饱和点 饱和点 饱和点 饱和点 饱和点 饱和点 饱和点 饱和点 饱和点 饱和点 饱和点 饱和点 饱和点 饱和点 饱和点 饱和点 饱和点 饱和点 饱和点 饱和点 饱和点 饱和点 饱和点 饱和点 饱和点 饱和点 饱和点 饱和点 饱和点 饱和点 饱和点 饱和点 饱和点 饱和点 饱和点 饱和点 饱和点 饱和点 饱和点 饱和点 饱和点 饱和点 饱和点 饱和点 饱和点 饱和点 饱和点 饱和点 饱和点 饱和点 饱和点 饱和点 饱和点 饱和点 饱和点 饱和点 饱和点 饱和点 饱和点 饱和点 饱和点 饱和点 饱和点 饱和点 饱和点 饱和点 饱和点 饱和点 饱和点 饱和点 饱和点 饱和点 饱和点 饱和点 饱和点 饱和点 饱和点 饱和点 饱和点 饱和点 饱和点 饱和点 饱和点 饱和点 饱和点 饱和点 饱和点 饱和点 饱和点 饱和点 饱和点 饱和点 饱和点 饱和点 饱和点 饱和点 饱和点 饱和点 饱和点 饱和点 饱和点 饱和点 饱和点 饱和点 饱和点 饱和点 饱和点 饱和点 饱和点 饱和点 饱和点 饱和点 饱和点 饱和点 饱和点 饱和点 饱和点 饱和点 饱和点 饱和点 饱和点 饱和点 饱和点 饱和点 饱和点 饱和点 饱和点 饱和点 饱和点 饱和点 饱和点 饱和点 饱和点 饱和点 饱和点 饱和点 饱和点 饱和点 饱和点 饱和点 饱和点 饱和点 饱和点 饱和点 饱和点 饱和点 饱和点 饱和点 饱和点 饱和点 饱和点 饱和点 饱和点 饱和点 饱和点 饱和点 饱和点 饱和点 饱和点 饱和点 饱和点 饱和点 饱和点 饱和点 饱和点 饱和点 饱和点 饱和点 饱和点 饱和点 饱和点 饱和点 饱和点 饱和点 饱和点 饱和点 饱和点 饱和点 饱和点 饱和点 饱和点 饱和点 饱和点 饱和点 饱和点 饱和点 饱和点 饱和点 饱和点 饱和点 饱和点 饱和点 饱和点 饱和点 饱和点 饱和点 饱和点 饱和点 饱和点 饱和点 饱和点 饱和点 饱和点 饱和点 饱和点 饱和点 饱和点 饱和点 饱和点 饱和点 饱和点 饱和点 饱和点 饱和点 饱和点 饱和点 饱和点 饱和点 饱和点 饱和点 饱和点 饱和点 饱和点 饱和点 饱和点 饱和点 饱和点 饱和点 饱和点 饱和点 饱和点 饱和点 饱和点 饱和点 饱和点 饱和点 饱和点 饱和点 饱和点 饱和点 饱和点 饱和点 饱和点 饱和点 饱和点 饱和点 饱和点 饱和点 饱和点 饱和点 饱和点 饱和点 饱和点 饱和点 饱和点 饱和点 饱和点 饱和点 饱和点 饱和点 饱和点 饱和点 饱和点 饱和点 饱和点 饱和点 饱和点 饱和点 饱和点 饱和点 饱和点 饱和点 饱和点 饱和点 饱和点 饱和点 饱和点 饱和点 饱和点 饱和点 饱和点 饱和点 饱和点 饱和点 饱和点 饱和点 饱和点 饱和点 饱和点 饱和点 饱和点 饱和点 饱和点 饱和点 饱和点 饱和点 饱和点 饱和点 饱和点 饱和点 饱和点 饱和点 饱和点 饱和点 饱和点 饱和点 饱和点 饱和点 饱和点 饱和点 饱和点 饱和点 饱和点 饱和点 饱和点 饱和点 饱和点 饱和点 饱和点 饱和点 饱和点 饱和点 饱和点 饱和点 饱和点 饱和点 饱和点 饱和点 饱和点 饱和点 饱和点 饱和点 饱和点 饱和点 饱和点 饱和点 饱和点 饱和点 饱和点 饱和点 饱和点 饱和点 饱和点 饱和点 饱和点 饱和点 饱和点 饱和点 饱和点 饱和点 饱和点 饱和点 饱和点 饱和点 饱和点 饱和点 饱和点 饱和点 饱和点 饱和点 饱和点 饱和点 饱和点 饱和点 饱和点 饱和点 饱和点 饱和点 饱和点 饱和点 饱和点 饱和点 饱和点 饱和点 饱和点 饱和点 饱和点 饱和点 饱和点 饱和点 饱和点 饱和点 饱和点 饱和点 饱和点 饱和点 饱和点 饱和点 饱和点 饱和点 饱和点 饱和点 饱和点 饱和点 饱和点 饱和点 饱和点 饱和点 饱和点 饱和点 饱和点 饱和点 饱和点 饱和点 饱和点 饱和点 饱和点 饱和点 饱和点 饱和点 饱和点 饱和点 饱和点 饱和点 饱和点 饱和点 饱和点 饱和点 饱和点 饱和点 饱和点 饱和点 饱和点 饱和点 饱和点 饱和点 饱和点 饱和点 饱和点 饱和点 饱和点 饱和点 饱和点 饱和点 饱和点 饱和点 饱和点 饱和点 饱和点 饱和点 饱和点 饱和点 饱和点 饱和点 饱和点 饱和点 饱和点 饱和点 饱和点 饱和点 饱和点 饱和点 饱和点 饱和点 饱和点 饱和点 饱和点 饱和点 饱和点 饱和点 饱和点 饱和点 饱和点 饱和点 饱和点 饱和点 饱和点 饱和点 饱和点 饱和点 饱和点 饱和点 饱和点 饱和点 饱和点 饱和点 饱和点 饱和点 饱和点 饱和点 饱和点 饱和点 饱和点 饱和点 饱和点 饱和点 饱和点 饱和点 饱和点 饱和点 饱和点 饱和点 饱和点 饱和点 饱和点 饱和点 饱和点 饱和点 饱和点 饱和点 饱和点 饱和点 饱和点 饱和点 饱和点 饱和点 饱和点 饱和点 饱和点 饱和点 饱和点 饱和点 饱和点 饱和点 饱和点 饱和点 饱和点 饱和点 饱和点 饱和点 饱和点 饱和点 饱和点 饱和点 饱和点 饱和点 饱和点 饱和点 饱和点 饱和点 饱和点 饱和点 饱和点 饱和点 饱和点 饱和点 饱和点 饱和点 饱和点 饱和点 饱和点 饱和点 饱和点 饱和点 饱和点 饱和点 饱和点 饱和点 饱和点 饱和点 饱和点 饱和点 饱和点 饱和点 饱和点 饱和点 饱和点 饱和点 饱和点 饱和点 饱和点 饱和点 饱和点 饱和点 饱和点 饱和点 饱和点 饱和点 饱和点 饱和点 饱和点 饱和点 饱和点 饱和点 饱和点 饱和点 饱和点 饱和点 饱和点 饱和点 饱和点 饱和点 饱和点 饱和点 饱和点 饱和点 饱和点 饱和点 饱和点 饱和点 饱和点 饱和点 饱和点 饱和点 饱和点 饱和点 饱和点 饱和点 饱和点 饱和点 饱和点 饱和点 饱和点 饱和点 饱和点 饱和点 饱和点 饱和点 饱和点 饱和点 饱和点 饱和点 饱和点 饱和点 饱和点 饱和点 饱和点 饱和点 饱和点 饱和点 饱和点 饱和点 饱和点 饱和点 饱和点 饱和点 饱和点 饱和点 饱和点 饱和点 饱和点 饱和点 饱和点 饱和点 饱和点 饱和点 饱和点 饱和点 饱和点 饱和点 饱和点 饱和点 饱和点 饱和点 饱和点 饱和点 饱和点 饱和点 饱和点 饱和点 饱和点 饱和点 饱和点 饱和点 饱和点 饱和点 饱和点 饱和点 饱和点 饱和点 饱和点 饱和点 饱和点 饱和点 饱和点 饱和点 饱和点 饱和点 饱和点 饱和点 饱和点 饱和点 饱和点 饱和点 饱和点 饱和点 饱和点 饱和点 饱和点 饱和点 饱和点 饱和点 饱和点 饱和点 饱和点 饱和点 饱和点 饱和点 饱和点 饱和点 饱和点 饱和点 饱和点 饱和点 饱和点 饱和点 饱和点 饱和点 饱和点 饱和点 饱和点 饱和点 饱和点 饱和点 饱和点 饱和点 饱和点 饱和点 饱和点 饱和点 饱和点 饱和点 饱和点 饱和点 饱和点 饱和点 饱和点 饱和点 饱和点 饱和点 饱和点 饱和点 饱和点 饱和点 饱和点 饱和点 饱和点 饱和点 饱和点 饱和点 饱和点 饱和点 饱和点 饱和点 饱和点 饱和点 饱和点 饱和点 饱和点 饱和点 饱和点 饱和点 饱和点 饱和点 饱和点 饱和点 饱和点 饱和点 饱和点 饱和点 饱和点 饱和点 饱和点 饱和点 饱和点 饱和点 饱和点 饱和点 饱和点 饱和点 饱和点 饱和点 饱和点 饱和点 饱和点 饱和点 饱和点 饱和点 饱和点 饱和点 饱和点 饱和点 饱和点 饱和点 饱和点 饱和点 饱和点 饱和点 饱和点 饱和点 饱和点 饱和点 饱和点 饱和点 饱和点 饱和点 饱和点 饱和点 饱和点 饱和点 饱和点 饱和点 饱和点 饱和点 饱和点 饱和点 饱和点 饱和点 饱和点 饱和点 饱和点 饱和点 饱和点 饱和点 饱和点 饱和点 饱和点 饱和点 饱和点 饱和点 饱和点 饱和点 饱和点 饱和点 饱和点 饱和点 饱和点 饱和点 饱和点 饱和点 饱和点 饱和点 饱和点 饱和点 饱和点 饱和点 饱和点 饱和点 饱和点 饱和点 饱和点 饱和点 饱和点 饱和点 饱和点 饱和点 饱和点 饱和点 饱和点 饱和点 饱和点 饱和点 饱和点 饱和点 饱和点 饱和点 饱和点 饱和点 饱和点 饱和点 饱和点 饱和点 饱和点 饱和点 饱和点 饱和点 饱和点 饱和点 饱和点 饱和点 饱和点 饱和点 饱和点 饱和点 饱和点 饱和点 饱和点 饱和点 饱和点 饱和点 饱和点 饱和点 饱和点 饱和点 饱和点 饱和点 饱和点 饱和点 饱和点 饱和点 饱和点 饱和点 饱和点 饱和点 饱和点 饱和点 饱和点 饱和点 饱和点 饱和点 饱和点 饱和点 饱和点 饱和点 饱和点 饱和点 饱和点 饱和点 饱和点 饱和点 饱和点 饱和点 饱和点 饱和点 饱和点 饱和点 饱和点 饱和点 饱和点 饱和点 饱和点 饱和点 饱和点 饱和点 饱和点 饱和点 饱和点 饱和点 饱和点 饱和点 饱和点 饱和点 饱和点 饱和点 饱和点 饱和点 饱和点 饱和点 饱和点 饱和点 饱和点 饱和点 饱和点 饱和点 饱和点 饱和点 饱和点 饱和点 饱和点 饱和点 饱和点 饱和点 饱和点 饱和点 饱和点 饱和点 饱和点 饱和点 饱和点 饱和点 饱和点 饱和点 饱和点 饱和点 饱和点 饱和点 饱和点 饱和点 饱和点 饱和点 饱和点 饱和点 饱和点 饱和点 饱和点 饱和点 饱和点 饱和点 饱和点 饱和点 饱和点 饱和点 饱和点 饱和点 饱和点 饱和点 饱和点 饱和点 饱和点 饱和点 饱和点 饱和点 饱和点 饱和点 饱和点 饱和点 饱和点 饱和点 饱和点 饱和点 饱和点 饱和点 饱和点 饱和点 饱和点 饱和点 饱和点 饱和点 饱和点 饱和点 饱和点 饱和点 饱和点 饱和点 饱和点 饱和点 饱和点 饱和点 饱和点 饱和点 饱和点 饱和点 饱和点 饱和点 饱和点 饱和点 饱和点 饱和点 饱和点 饱和点 饱和点 饱和点 饱和点 饱和点 饱和点 饱和点 饱和点 饱和点 饱和点 饱和点 饱和点 饱和点 饱和点 饱和点 饱和点 饱和点 饱和点 饱和点 饱和点 饱和点 饱和点 饱和点 饱和点 饱和点 饱和点 饱和点 饱和点 饱和点 饱和点 饱和点 饱和点 饱和点 饱和点 饱和点 饱和点 饱和点 饱和点 饱和点 饱和点 饱和点 饱和点 饱和点 饱和点 饱和点 饱和点 饱和点 饱和点 饱和点 饱和点 饱和点 饱和点 饱和点 饱和点 饱和点 饱和点 饱和点 饱和点 饱和点 饱和点 饱和点 饱和点 饱和点 饱和点 饱和点 饱和点 饱和点 饱和点 饱和点 饱和点 饱和点 饱和点 饱和点 饱和点 饱和点 饱和点 饱和点 饱和点 饱和点 饱和点 饱和点 饱和点 饱和点 饱和点 饱和点 饱和点 饱和点 饱和点 饱和点 饱和点 饱和点 饱和点 饱和点 饱和点 饱和点 饱和点 饱和点 饱和点 饱和点 饱和点 饱和点 饱和点 饱和点 饱和点 饱和点 饱和点 饱和点 饱和点 饱和点 饱和点 饱和点 饱和点 饱和点 饱和点 饱和点 饱和点 饱和点 饱和点 饱和点 饱和点 饱和点 饱和点 饱和点 饱和点 饱和点 饱和点 饱和点 饱和点 饱和点 饱和点 饱和点 饱和点 饱和点 饱和点 饱和点 饱和点 饱和点 饱和点 饱和点 饱和点 饱和点 饱和点 饱和点 饱和点 饱和点 饱和点 饱和点 饱和点 饱和点 饱和点 饱和点 饱和点 饱和点 饱和点 饱和点 饱和点 饱和点 饱和点 饱和点 饱和点 饱和点 饱和点 饱和点 饱和点 饱和点 饱和点 饱和点 饱和点 饱和点 饱和点 饱和点 饱和点 饱和点 饱和点 饱和点 饱和点 饱和点 饱和点 饱和点 饱和点 饱和点 饱和点 饱和点 饱和点 饱和点 饱和点 饱和点 饱和点 饱和点 饱和点 饱和点 饱和点 饱和点 饱和点 饱和点 饱和点 饱和点 饱和点 饱和点 饱和点 饱和点 饱和点 饱和点 饱和点 饱和点 饱和点 饱和点 饱和点 饱和点 饱和点 饱和点 饱和点 饱和点 饱和点 饱和点 饱和点 饱和点 饱和点 饱和点 饱和点 饱和点 饱和点 饱和点 饱和点 饱和点 饱和点 饱和点 饱和点 饱和点 饱和点 饱和点 饱和点 饱和点 饱和点 饱和点 饱和点 饱和点 饱和点 饱和点 饱和点 饱和点 饱和点 饱和点 饱和点 饱和点 饱和点 饱和点 饱和点 饱和点 饱和点 饱和点 饱和点 饱和点 饱和点 饱和点 饱和点 饱和点 饱和点 饱和点 饱和点 饱和点 饱和点 饱和点 饱和点 饱和点 饱和点 饱和点 饱和点 饱和点 饱和点 饱和点 饱和点 饱和点 饱和点 饱和点 饱和点 饱和点 饱和点 饱和点 饱和点 饱和点 饱和点 饱和点 饱和点 饱和点 饱和点 饱和点 饱和点 饱和点 饱和点 饱和点 饱和点 饱和点 饱和点 饱和点 饱和点 饱和点 饱和点 饱和点 饱和点 饱和点 饱和点 饱和点 饱和点 饱和点 饱和点 饱和点 饱和点 饱和点 饱和点 饱和点 饱和点 饱和点 饱和点 饱和点 饱和点 饱和点 饱和点 饱和点 饱和点 饱和点 饱和点 饱和点 饱和点 饱和点 饱和点 饱和点 饱和点 饱和点 饱和点 饱和点 饱和点 饱和点 饱和点 饱和点 饱和点 饱和点 饱和点 饱和点 饱和点 饱和点 饱和点 饱和点 饱和点 饱和点 饱和点 饱和点 饱和点 饱和点 饱和点 饱和点 饱和点 饱和点 饱和点 饱和点 饱和点 饱和点 饱和点 饱和点 饱和点 饱和点 饱和点 饱和点 饱和点 饱和点 饱和点 饱和点 饱和点 饱和点 饱和点 饱和点 饱和点 饱和点 饱和点 饱和点 饱和点 饱和点 饱和点 饱和点 饱和点 饱和点 饱和点 饱和点 饱和点 饱和点 饱和点 饱和点 饱和点 饱和点 饱和点 饱和点 饱和点 饱和点 饱和点 饱和点 饱和点 饱和点 饱和点 饱和点 饱和点 饱和点 饱和点 饱和点 饱和点 饱和点 饱和点 饱和点 饱和点 饱和点 饱和点 饱和点 饱和点 饱和点 饱和点 饱和点 饱和点 饱和点 饱和点 饱和点 饱和点 饱和点 饱和点 饱和点 饱和点 饱和点 饱和点 饱和点 饱和点 饱和点 饱和点 饱和点 饱和点 饱和点 饱和点 饱和点 饱和点 饱和点 饱和点 饱和点 饱和点 饱和点 饱和点 饱和点 饱和点 饱和点 饱和点 饱和点 饱和点 饱和点 饱和点 饱和点 饱和点 饱和点 饱和点 饱和点 饱和点 饱和点 饱和点 饱和点 饱和点 饱和点 饱和点 饱和点 饱和点 饱和点 饱和点 饱和点 饱和点 饱和点 饱和点 饱和点 饱和点 饱和点 饱和点 饱和点 饱和点 饱和点 饱和点 饱和点 饱和点 饱和点 饱和点 饱和点 饱和点 饱和点 饱和点 饱和点 饱和点 饱和点 饱和点 饱和点 饱和点 饱和点 饱和点 饱和点 饱和点 饱和点 饱和点 饱和点 饱和点 饱和点 饱和点 饱和点 饱和点 饱和点 饱和点 饱和点 饱和点 饱和点 饱和点 饱和点 饱和点 饱和点 饱和点 饱和点 饱和点 饱和点 饱和点 饱和点 饱和点 饱和点 饱和点 饱和点 饱和点 饱和点 饱和点 饱和点 饱和点 饱和点 饱和点 饱和点 饱和点 饱和点 饱和点 饱和点 饱和点 饱和点 饱和点 饱和点 饱和点 饱和点 饱和点 饱和点 饱和点 饱和点 饱和点 饱和点 饱和点 饱和点 饱和点 饱和点 饱和点 饱和点 饱和点 饱和点 饱和点 饱和点 饱和点 饱和点 饱和点 饱和点 饱和点 饱和点 饱和点 饱和点 饱和点 饱和点 饱和点 饱和点 饱和点 饱和点 饱和点 饱和点 饱和点 饱和点 饱和点 饱和点 饱和点 饱和点 饱和点 饱和点 饱和点 饱和点 饱和点 饱和点 饱和点 饱和点 饱和点 饱和点 饱和点 饱和点 饱和点 饱和点 饱和点 饱和点 饱和点 饱和点 饱和点 饱和点 饱和点 饱和点 饱和点 饱和点 饱和点 饱和点 饱和点 饱和点 饱和点 饱和点 饱和点 饱和点 饱和点 饱和点 饱和点 饱和点 饱和点 饱和点 饱和点 饱和点 饱和点 饱和点 饱和点 饱和点 饱和点 饱和点 饱和点 饱和点 饱和点 饱和点 饱和点 饱和点 饱和点 饱和点 饱和点 饱和点 饱和点 饱和点 饱和点 饱和点 饱和点 饱和点 饱和点 饱和点 饱和点 饱和点 饱和点 饱和点 饱和点 饱和点 饱和点 饱和点 饱和点 饱和点 饱和点 饱和点 饱和点 饱和点 饱和点 饱和点 饱和点 饱和点 饱和点 饱和点 饱和点 饱和点 饱和点 饱和点 饱和点 饱和点 饱和点 饱和点 饱和点 饱和点 饱和点 饱和点 饱和点 饱和点 饱和点 饱和点 饱和点 饱和点 饱和点 饱和点 饱和点 饱和点 饱和点 饱和点 饱和点 饱和点 饱和点 饱和点 饱和点 饱和点 饱和点 饱和点 饱和点 饱和点 饱和点 饱和点 饱和点 饱和点 饱和点 饱和点 饱和点 饱和点 饱和点 饱和点 饱和点 饱和点 饱和点 饱和点 饱和点 饱和点 饱和点 饱和点 饱和点 饱和点 饱和点 饱和点 饱和点 饱和点 饱和点 饱和点 饱和点 饱和点 饱和点 饱和点 饱和点 饱和点 饱和点 饱和点 饱和点 饱和点 饱和点 饱和点 饱和点 饱和点 饱和点 饱和点 饱和点 饱和点 饱和点 饱和点 饱和点 饱和点 饱和点 饱和点 饱和点 饱和点 饱和点 饱和点 饱和点 饱和点 饱和点 饱和点 饱和点 饱和点 饱和点 饱和点 饱和点 饱和点 饱和点 饱和点 饱和点 饱和点 饱和点 饱和点 饱和点 饱和点 饱和点 饱和点 饱和点 饱和点 饱和点 饱和点 饱和点 饱和点 饱和点 饱和点 饱和点 饱和点 饱和点 饱和点 饱和点 饱和点 饱和点 饱和点 饱和点 饱和点 饱和点 饱和点 饱和点 饱和点 饱和点 饱和点 饱和点 饱和点 饱和点 饱和点 饱和点 饱和点 饱和点 饱和点 饱和点 饱和点 饱和点 饱和点 饱和点 饱和点 饱和点 饱和点 饱和点 饱和点 饱和点 饱和点 饱和点 饱和点 饱和点 饱和点 饱和点 饱和点 饱和点 饱和点 饱和点 饱和点 饱和点 饱和点 饱和点 饱和点 饱和点 饱和点 饱和点 饱和点 饱和点 饱和点 饱和点 饱和点 饱和点 饱和点 饱和点 饱和点 饱和点 饱和点 饱和点 饱和点 饱和点 饱和点 饱和点 饱和点 饱和点 饱和点 饱和点 饱和点 饱和点 饱和点 饱和点 饱和点 饱和点 饱和点 饱和点 饱和点 饱和点 饱和点 饱和点 饱和点 饱和点 饱和点 饱和点 饱和点 饱和点 饱和点 饱和点 饱和点 饱和点 饱和点 饱和点 饱和点 饱和点 饱和点 饱和点 饱和点 饱和点 饱和点 饱和点 饱和点 饱和点 饱和点 饱和点 饱和点 饱和点 饱和点 饱和点 饱和点 饱和点 饱和点 饱和点 饱和点 饱和点 饱和点 饱和点 饱和点 饱和点 饱和点 饱和点 饱和点 饱和点 饱和点 饱和点 饱和点 饱和点 饱和点 饱和点 饱和点 饱和点 饱和点 饱和点 饱和点 饱和点 饱和点 饱和点 饱和点 饱和点 饱和点 饱和点 饱和点 饱和点 饱和点 饱和点 饱和点 饱和点 饱和点 饱和点 饱和点 饱和点 饱和点 饱和点 饱和点 饱和点 饱和点 饱和点 饱和点 饱和点 饱和点 饱和点 饱和点 饱和点 饱和点 饱和点 饱和点 饱和点 饱和点 饱和点 饱和点 饱和点 饱和点 饱和点 饱和点 饱和点 饱和点 饱和点 饱和点 饱和点 饱和点 饱和点 饱和点 饱和点 饱和点 饱和点 饱和点 饱和点 饱和点 饱和点 饱和点 饱和点 饱和点 饱和点 饱和点 饱和点 饱和点 饱和点 饱和点 饱和点 饱和点 饱和点 饱和点 饱和点 饱和点 饱和点 饱和点 饱和点 饱和点 饱和点 饱和点 饱和点 饱和点 饱和点 饱和点 饱和点 饱和点 饱和点 饱和点 饱和点 饱和点 饱和点 饱和点 饱和点 饱和点 饱和点 饱和点 饱和点 饱和点 饱和点 饱和点 饱和点 饱和点 饱和点 饱和点 饱和点 饱和点 饱和点 饱和点 饱和点 饱和点 饱和点 饱和点 饱和点 饱和点 饱和点 饱和点 饱和点 饱和点 饱和点 饱和点 饱和点 饱和点 饱和点 饱和点 饱和点 饱和点 饱和点 饱和点 饱和点 饱和点 饱和点 饱和点 饱和点 饱和点 饱和点 饱和点 饱和点 饱和点 饱和点 饱和点 饱和点 饱和点 饱和点 饱和点 饱和点 饱和点 饱和点 饱和点 饱和点 饱和点 饱和点 饱和点 饱和点 饱和点 饱和点 饱和点 饱和点 饱和点 饱和点 饱和点 饱和点 饱和点 饱和点 饱和点 饱和点 饱和点 饱和点 饱和点 饱和点 饱和点 饱和点 饱和点 饱和点 饱和点 饱和点 饱和点 饱和点 饱和点 饱和点 饱和点 饱和点 饱和点 饱和点 饱和点 饱和点 饱和点 饱和点 饱和点 饱和点 饱和点 饱和点 饱和点 饱和点 饱和点 饱和点 饱和点 饱和点 饱和点 饱和点 饱和点 饱和点 饱和点 饱和点 饱和点 饱和点 饱和点 饱和点 饱和点 饱和点 饱和点 饱和点 饱和点 饱和点 饱和点 饱和点 饱和点 饱和点 饱和点 饱和点 饱和点 饱和点 饱和点 饱和点 饱和点 饱和点 饱和点 饱和点 饱和点 饱和点 饱和点 饱和点 饱和点 饱和点 饱和点 饱和点 饱和点 饱和点 饱和点 饱和点 饱和点 饱和点 饱和点 饱和点 饱和点 饱和点 饱和点 饱和点 饱和点 饱和点 饱和点 饱和点 饱和点 饱和点 饱和点 饱和点 饱和点 饱和点 饱和点 饱和点 饱和点 饱和点 饱和点 饱和点 饱和点 饱和点 饱和点 饱和点 饱和点 饱和点 饱和点 饱和点 饱和点 饱和点 饱和点 饱和点 饱和点 饱和点 饱和点 饱和点 饱和点 饱和点 饱和点 饱和点 饱和点 饱和点 饱和点 饱和点 饱和点 饱和点 饱和点 饱和点 饱和点 饱和点 饱和点 饱和点 饱和点 饱和点 饱和点 饱和点 饱和点 饱和点 饱和点 饱和点 饱和点 饱和点 饱和点 饱和点 饱和点 饱和点 饱和点 饱和点 饱和点 饱和点 饱和点 饱和点 饱和点 饱和点 饱和点 饱和点 饱和点 饱和点 饱和点 饱和点 饱和点 饱和点 饱和点 饱和点 饱和点 饱和点 饱和点 饱和点 饱和点 饱和点 饱和点 饱和点 饱和点 饱和点 饱和点 饱和点 饱和点 饱和点 饱和点 饱和点 饱和点 饱和点 饱和点 饱和点 饱和点 饱和点 饱和点 饱和点 饱和点 饱和点 饱和点 饱和点 饱和点 饱和点 饱和点 饱和点 饱和点 饱和点 饱和点 饱和点 饱和点 饱和点 饱和点 饱和点 饱和点 饱和点 饱和点 饱和点 饱和点 饱和点 饱和点 饱和点 饱和点 饱和点 饱和点 饱和点 饱和点 饱和点 饱和点 饱和点 饱和点 饱和点 饱和点 饱和点 饱和点 饱和点 饱和点 饱和点 饱和点 饱和点 饱和点 饱和点 饱和点 饱和点 饱和点 饱和点 饱和点 饱和点 饱和点 饱和点 饱和点 饱和点 饱和点 饱和点 饱和点 饱和点 饱和点 饱和点 饱和点 饱和点 饱和点 饱和点 饱和点 饱和点 饱和点 饱和点 饱和点 饱和点 饱和点 饱和点 饱和点 饱和点 饱和点 饱和点 饱和点 饱和点 饱和点 饱和点 饱和点 饱和点 饱和点 饱和点 饱和点 饱和点 饱和点 饱和点 饱和点 饱和点 饱和点 饱和点 饱和点 饱和点 饱和点 饱和点 饱和点 饱和点 饱和点 饱和点 饱和点 饱和点 饱和点 饱和点 饱和点 饱和点 饱和点 饱和点 饱和点 饱和点 饱和点 饱和点 饱和点 饱和点 饱和点 饱和点 饱和点 饱和点 饱和点 饱和点 饱和点 饱和点 饱和点 饱和点 饱和点 饱和点 饱和点 饱和点 饱和点 饱和点 饱和点 饱和点 饱和点 饱和点 饱和点 饱和点 饱和点 饱和点 饱和点 饱和点 饱和点 饱和点 饱和点 饱和点 饱和点 饱和点 饱和点 饱和点 饱和点 饱和点 饱和点 饱和点 饱和点 饱和点 饱和点 饱和点 饱和点 饱和点 饱和点 饱和点 饱和点 饱和点 饱和点 饱和点 饱和点 饱和点 饱和点 饱和点 饱和点 饱和点 饱和点 饱和点 饱和点 饱和点 饱和点 饱和点 饱和点 饱和点 饱和点 饱和点 饱和点 饱和点 饱和点 饱和点 饱和点 饱和点 饱和点 饱和点 饱和点 饱和点 饱和点 饱和点 饱和点 饱和点 饱和点 饱和点 饱和点 饱和点 饱和点 饱和点 饱和点 饱和点 饱和点 饱和点 饱和点 饱和点 饱和点 饱和点 饱和点 饱和点 饱和点 饱和点 饱和点 饱和点 饱和点 饱和点 饱和点 饱和点 饱和点 饱和点 饱和点 饱和点 饱和点 饱和点 饱和点 饱和点 饱和点 饱和点 饱和点 饱和点 饱和点 饱和点 饱和点 饱和点 饱和点 饱和点 饱和点 饱和点 饱和点 饱和点 饱和点 饱和点 饱和点 饱和点 饱和点 饱和点 饱和点 饱和点 饱和点 饱和点 饱和点 饱和点 饱和点 饱和点 饱和点 饱和点 饱和点 饱和点 饱和点 饱和点 饱和点 饱和点 饱和点 饱和点 饱和点 饱和点 饱和点 饱和点 饱和点 饱和点 饱和点 饱和点 饱和点 饱和点 饱和点 饱和点 饱和点 饱和点 饱和点 饱和点 饱和点 饱和点 饱和点 饱和点 饱和点 饱和点 饱和点 饱和点 饱和点 饱和点 饱和点 饱和点 饱和点 饱和点 饱和点 饱和点 饱和点 饱和点 饱和点 饱和点 饱和点 饱和点 饱和点 饱和点 饱和点 饱和点 饱和点 饱和点 饱和点 饱和点 饱和点 饱和点 饱和点 饱和点 饱和点 饱和点 饱和点 饱和点 饱和点 饱和点 饱和点 饱和点 饱和点 饱和点 饱和点 饱和点 饱和点 饱和点 饱和点 饱和点 饱和点 饱和点 饱和点 饱和点 饱和点 饱和点 饱和点 饱和点 饱和点 饱和点 饱和点 饱和点 饱和点 饱和点 饱和点 饱和点 饱和点 饱和点 饱和点 饱和点 饱和点 饱和点 饱和点 饱和点 饱和点 饱和点 饱和点 饱和点 饱和点 饱和点 饱和点 饱和点 饱和点 饱和点 饱和点 饱和点 饱和点 饱和点 饱和点 饱和点 饱和点 饱和点 饱和点 饱和点 饱和点 饱和点 饱和点 饱和点 饱和点 饱和点 饱和点 饱和点 饱和点 饱和点 饱和点 饱和点 饱和点 饱和点 饱和点 饱和点 饱和点 饱和点 饱和点 饱和点 饱和点 饱和点 饱和点 饱和点 饱和点 饱和点 饱和点 饱和点 饱和点 饱和点 饱和点 饱和点 饱和点 饱和点 饱和点 饱和点 饱和点 饱和点 饱和点 饱和点 饱和点 饱和点 饱和点 饱和点 饱和点 饱和点 饱和点 饱和点 饱和点 饱和点 饱和点 饱和点 饱和点 饱和点 饱和点 饱和点 饱和点 饱和点 饱和点 饱和点 饱和点 饱和点 饱和点 饱和点 饱和点 饱和点 饱和点 饱和点 饱和点 饱和点 饱和点 饱和点 饱和点 饱和点 饱和点 饱和点 饱和点 饱和点 饱和点 饱和点 饱和点 饱和点 饱和点 饱和点 饱和点 饱和点 饱和点 饱和点 饱和点 饱和点 饱和点 饱和点 饱和点 饱和点 饱和点 饱和点 饱和点 饱和点 饱和点 饱和点 饱和点 饱和点 饱和点 饱和点 饱和点 饱和点 饱和点 饱和点 饱和点 饱和点 饱和点 饱和点 饱和点 饱和点 饱和点 饱和点 饱和点 饱和点 饱和点 饱和点 饱和点 饱和点 饱和点 饱和点 饱和点 饱和点 饱和点 饱和点 饱和点 饱和点 饱和点 饱和点 饱和点 饱和点 饱和点 饱和点 饱和点 饱和点 饱和点 饱和点 饱和点 饱和点 饱和点 饱和点 饱和点 饱和点 饱和点 饱和点 饱和点 饱和点 饱和点 饱和点 饱和点 饱和点 饱和点 饱和点 饱和点 饱和点 饱和点 饱和点 饱和点 饱和点 饱和点 饱和点 饱和点 饱和点 饱和点 饱和点 饱和点 饱和点 饱和点 饱和点 饱和点 饱和点 饱和点 饱和点 饱和点 饱和点 饱和点 饱和点 饱和点 饱和点 饱和点 饱和点 饱和点 饱和点 饱和点 饱和点 饱和点 饱和点 饱和点 饱和点 饱和点 饱和点 饱和点 饱和点 饱和点 饱和点 饱和点 饱和点 饱和点 饱和点 饱和点 饱和点 饱和点 饱和点 饱和点 饱和点 饱和点 饱和点 饱和点 饱和点 饱和点 饱和点 饱和点 饱和点 饱和点 饱和点 饱和点 饱和点 饱和点 饱和点 饱和点 饱和点 饱和点 饱和点 饱和点 饱和点 饱和点 饱和点 饱和点 饱和点 饱和点 饱和点 饱和点 饱和点 饱和点 饱和点 饱和点 饱和点 饱和点 饱和点 饱和点 饱和点 饱和点 饱和点 饱和点 饱和点 饱和点 饱和点 饱和点 饱和点 饱和点 饱和点 饱和点 饱和点 饱和点 饱和点 饱和点 饱和点 饱和点 饱和点 饱和点 饱和点 饱和点 饱和点 饱和点 饱和点 饱和点 饱和点 饱和点 饱和点 饱和点 饱和点 饱和点 饱和点 饱和点 饱和点 饱和点 饱和点 饱和点 饱和点 饱和点 饱和点 饱和点 饱和点 饱和点 饱和点 饱和点 饱和点 饱和点 饱和点 饱和点 饱和点 饱和点 饱和点 饱和点 饱和点 饱和点 饱和点 饱和点 饱和点 饱和点 饱和点 饱和点 饱和点 饱和点 饱和点 饱和点 饱和点 饱和点 饱和点 饱和点 饱和点 饱和点 饱和点 饱和点 饱和点 饱和点 饱和点 饱和点 饱和点 饱和点 饱和点 饱和点 饱和点 饱和点 饱和点 饱和点 饱和点 饱和点 饱和点 饱和点 饱和点 饱和点 饱和点 饱和点 饱和点 饱和点 饱和点 饱和点 饱和点 饱和点 饱和点 饱和点 饱和点 饱和点 饱和点 饱和点 饱和点 饱和点 饱和点 饱和点 饱和点 饱和点 饱和点 饱和点 饱和点 饱和点 饱和点 饱和点 饱和点 饱和点 饱和点 饱和点 饱和点 饱和点 饱和点 饱和点 饱和点 饱和点 饱和点 饱和点 饱和点 饱和点 饱和点 饱和点 饱和点 饱和点 饱和点 饱和点 饱和-activated carbon filters, which use adsorption to trap chemical impurities. Their “pores” get filled up.
- What you’ll notice: The chlorine taste and smell might come back. The water just won’t taste as crisp or clean.
- The risk: Once saturated, the filter can’t grab any more contaminants. It’s like a full sponge; anything new just passes right on by. In some rare cases, a process called “desorption” can occur, where a change in water pressure or temperature could cause the filter to release a burst of the very contaminants it was supposed to capture. Yikes!
The Biofilm Nightmare 🦠
This is the one that really gets our health professionals talking. A filter that is damp, dark, and full of trapped organic material is the perfect breeding ground for bacteria and mold. This slimy layer is called biofilm.
- What you’ll notice: Slimy residue inside the filter housing or a musty, “off” smell from your water.
- The risk: A contaminated filter can introduce bacteria into your “clean” water, which completely defeats the purpose of having a filter in the first place. As the guide from HomeWater warns, neglecting maintenance can lead to “potential health risks from bacterial growth.”
| Maintenance Status | Water Quality Outcome | System Health |
|---|---|---|
| ✅ Regularly Maintained | Consistently pure, great-tasting water. | Optimal flow rate, long system lifespan. |
| ❌ Neglected | Poor taste, returning contaminants, potential bacteria. | Clogged system, reduced flow, risk of damage. |
So, regular maintenance isn’t just a suggestion from the manufacturer to sell more filters. It’s a critical step to ensure your water is safe, your system works efficiently, and you’re getting the protection you paid for.
🔧 How to Maintain Your Water Filter Like a Pro: Step-by-Step Guide
Feeling a little intimidated? Don’t be! For most common systems, maintenance is easier than you think. Our team has changed hundreds of filters, from the simplest to the most complex, and we’ve boiled it down to a universal, five-step process.
-
Step 1: Consult Your Manual & Get Your Gear Before you touch anything, read the manufacturer’s instructions. We know, we know, but it’s crucial. It will tell you the exact filter model you need and any special quirks of your system. Then, gather your supplies: the new filter(s), a bucket or towel for drips, and any specific tools like a filter housing wrench.
-
Step 2: Turn Off the Water Supply This is non-negotiable for any under-sink or whole-home system! Find the shut-off valve that leads to your filter (it’s usually a small handle on the cold water line) and turn it clockwise until it stops. For pitchers, well, you can skip this step. 😉
-
Step 3: Release the Pressure & Remove the Old Filter Open the filtered water faucet to drain any remaining water and release the pressure in the lines. Now, use your housing wrench (or your hands for twist-off models) to unscrew the filter housing. Turn it counter-clockwise (“lefty-loosey”). Be prepared for some water to spill out—that’s what the bucket is for! Take out the old, gunked-up filter.
-
Step 4: Clean & Replace Take a moment to clean the inside of the filter housing with a little soap and warm water (rinse thoroughly!). Check the O-ring for cracks or dryness. A little food-grade silicone grease on the O-ring will ensure a good seal. Pop the new filter in, making sure it’s seated correctly.
-
Step 5: Reassemble, Turn On & Flush! Screw the housing back on, hand-tightening first and then giving it a gentle final turn with the wrench. Don’t over-tighten! Slowly turn the water supply back on and check for leaks. Finally, and this is key, flush the new filter by running the water for 5-10 minutes, just as EcoPureHome advises, to “release the loose material in the new filter.” This gets rid of any harmless carbon fines and activates the filter.
And that’s it! You’ve just maintained your filter like a pro. Now, let’s get into the specifics for different types.
1️⃣ Activated Carbon Filters: Installation Nuances and Maintenance Must-Knows
Activated carbon filters are the workhorses of the water filtration world. They’re fantastic at removing chlorine, volatile organic compounds (VOCs), and other chemicals that make your water taste and smell like a swimming pool. You’ll find them in everything from pitchers to massive whole-home tanks.
Installation Insights
The installation difficulty for carbon filters is all over the map, depending on the form factor.
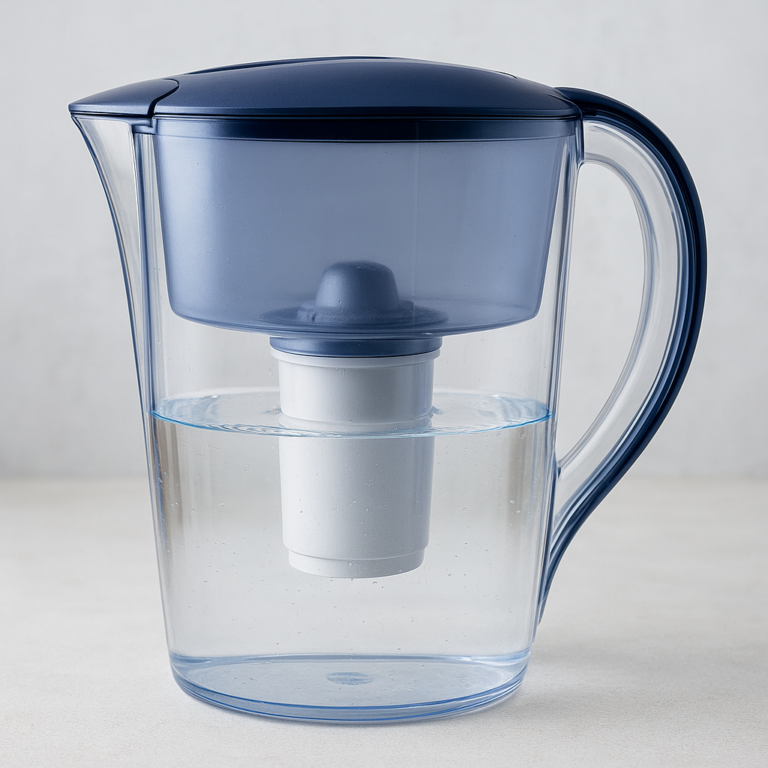
- Pitchers (e.g., Brita, PUR): ✅ Easiest. You literally just drop the filter in. If you can make a cup of tea, you can install one of these.
- Faucet Mounts (e.g., PUR, Culligan): ✅ Easy. These usually screw onto your existing faucet in minutes. The biggest challenge is finding the right adapter in the box.
- Under-Sink (e.g., Aquasana, Culligan): ⚠️ Moderate. These require tapping into your cold water line. It’s a great DIY project if you’re comfortable with basic plumbing, but can be daunting for a first-timer.
Maintenance Rituals
Maintenance is all about one thing: replacing the cartridge. The carbon’s surface area gets saturated over time.
- Frequency: For pitchers and faucet mounts, expect to replace every 2-3 months. For under-sink systems, it’s typically every 6 months.
- The Process: It’s a simple swap. For pitchers, pull the old one out, pop the new one in. For under-sink systems, you’ll follow the 5-step pro guide we outlined above.
- Crucial Step: Always flush the new carbon filter! The first few gallons will often have black specks of “carbon fines.” This is normal and harmless, but you don’t want it in your glass.
| Brand/Type | Installation Ease (1-10) | Typical Maintenance | Tools Needed |
|---|---|---|---|
| Brita Pitcher | 10 (Easiest) | Replace cartridge every 2 months | None |
| PUR Faucet Mount | 8 (Easy) | Replace cartridge every 3 months | Maybe pliers |
| Aquasana Under-Sink | 5 (Moderate) | Replace cartridges every 6 months | Wrench, drill, bucket |
👉 Shop Activated Carbon Filters on:
- Brita: Amazon | Walmart | Brita Official Website
- PUR: Amazon | Walmart | PUR Official Website
- Aquasana: Amazon | Walmart | Aquasana Official Website
2️⃣ Reverse Osmosis Systems: Complex Installation and Care Tips
Welcome to the big leagues! Reverse Osmosis (RO) systems are the heavyweight champions of water purification, removing an incredible range of contaminants, including heavy metals, fluoride, salts, and even “forever chemicals.” But with great power comes… well, a more involved installation and maintenance schedule.
As the experts in our featured video explain, an RO system is the “hands-down best way to get super pure drinking water on tap 24/7.” They rightly point out that simple carbon filters like Brita “remove just a small fraction of the contaminants in your water compared to a reverse osmosis drinking water system.”
Installation: Not for the Faint of Heart 💔
An RO system isn’t a single filter; it’s a component-based system.
- Multiple Filters: You’ll have at least three: a sediment pre-filter, a carbon pre-filter, and the RO membrane itself. Many also have a carbon post-filter.
- Storage Tank: RO works slowly, so it needs a pressurized tank to store the purified water.
- Dedicated Faucet: You’ll need to drill a hole in your countertop or sink for a separate, dedicated RO faucet.
- Drain Line: The RO process creates wastewater (brine) that flushes contaminants away. This requires tapping into your sink’s drain pipe.
Our Verdict: ❌ Difficult. While a handy DIYer can tackle it, as the video suggests, we recommend professional installation for most people to avoid leaks and ensure it’s set up for peak efficiency.
Maintenance: A Multi-Stage Affair
RO maintenance is a marathon, not a sprint. Different parts need attention at different times.
| Component | Purpose | Replacement Frequency |
|---|---|---|
| Sediment Pre-Filter | Protects the system from dirt, rust, and silt. | Every 6-12 months |
| Carbon Pre-Filter | Protects the RO membrane from chlorine. | Every 6-12 months |
| RO Membrane | The core of the system; removes the vast majority of contaminants. | Every 2-5 years |
| Carbon Post-Filter | A final “polish” for taste after the water leaves the tank. | Every 12 months |
Pro Tip: Replace your pre-filters on a strict schedule! This is the single best thing you can do to protect the expensive RO membrane and prolong its life. Popular brands like APEC, Waterdrop, and iSpring often sell filter replacement kits to make this easier.
👉 Shop Reverse Osmosis Systems on:
- APEC Water Systems: Amazon | Walmart | APEC Official Website
- Waterdrop: Amazon | Walmart | Waterdrop Official Website
- iSpring: Amazon | Walmart | iSpring Official Website
3️⃣ Ultraviolet (UV) Light Filters: Unique Setup and Upkeep Essentials
Now for something completely different! A UV filter doesn’t actually filter anything. It’s a purification system. Think of it as a microscopic bug zapper for your water. It uses a powerful UV-C light to scramble the DNA of bacteria, viruses, and other microorganisms, rendering them harmless. It’s a must-have for anyone on well water or concerned about biological contaminants.
Installation: It’s Electric! ⚡
- Plumbing: Like a whole-home system, a UV purifier is installed on your main water line after any sediment filters. This usually requires cutting into the pipe, so it’s often a job for a plumber.
- Electrical: Here’s the big difference: it needs power. You’ll need a standard electrical outlet nearby to plug in the controller (ballast).
- Pre-Filtration is Key: UV light can’t penetrate cloudy water. You must have at least a 5-micron sediment filter installed before the UV system, or it won’t be effective.
Maintenance: It’s All About the Bulb and Sleeve
UV maintenance is simple but critical. You’re not changing filters full of gunk; you’re maintaining the light source.
- Replace the UV Lamp Annually: This is the most important task. A UV lamp loses its intensity over time, even if it still lights up. After one year (about 9,000 hours), it may not be strong enough to guarantee disinfection. Do not skip this!
- Clean the Quartz Sleeve: The UV lamp is protected from the water by a clear quartz tube, or “sleeve.” Over time, minerals and sediment can coat this sleeve, blocking the UV light. As HomeWater‘s guide advises, you need to “keep quartz sleeve clean every few months.” This involves carefully removing it and wiping it down with a cloth and a scale-removing cleaner like CLR or vinegar.
Leading brands in the UV space, like Viqua, have made this process fairly user-friendly, but it does require shutting off the water, depressurizing the system, and being careful not to break the fragile quartz sleeve.
👉 Shop UV Water Purifiers on:
- Viqua: Amazon | eBay | Viqua Official Website
4️⃣ Whole Home Water Filtration Systems: Installation Challenges and Maintenance Schedules
A whole-home system is the ultimate solution for pristine water from every tap in your house—from your kitchen sink to your shower. It’s an amazing upgrade, but it’s also the most significant in terms of installation and maintenance commitment.
Installation: Call in the Pros 📞
Let’s be blunt: for 99% of homeowners, this is not a DIY job.
- Main Line Work: The system is installed right where your main water line enters your house. This requires shutting off water to the entire home and cutting, fitting, and soldering pipes.
- Space & Drainage: These systems are large and heavy. You need a suitable location with enough space and, for many models, access to a drain for backwashing cycles.
- Complexity: Systems can be single-tank media filters, multi-tank setups with water softeners, or cartridge-based systems. Each has its own plumbing configuration.
Our advice? Hire a licensed plumber. The peace of mind is worth every penny.
Maintenance: A Long-Term Commitment
Maintenance varies wildly by the type of whole-home system you choose.
- Large Cartridge Systems (e.g., EcoPure, Whirlpool): These are the simplest to maintain. You’ll typically replace large sediment and/or carbon block filters every 3-12 months, depending on your water usage and quality. The process is similar to our 5-step guide but on a larger scale.
- Tank-Style Media Systems (e.g., SpringWell, Pelican): These are the “set it and forget it” models… mostly.
- Backwashing: Many systems, as noted by Cal’s Plumbing, have an automatic backwashing feature that flushes the media bed every few days to prevent clogging. You just need to make sure it’s programmed correctly.
- Media Replacement: The filter media itself (the carbon, KDF, or other minerals in the tank) is the real “filter.” This stuff lasts a long time, but not forever. You’ll need to replace it every 3 to 10 years, depending on the system. This is a big, heavy, and often messy job that most people hire a professional for.
- Pre-Filter Changes: Nearly all tank systems have a sediment pre-filter that needs to be changed every 3-9 months to protect the main tank.
As Cal’s Plumbing wisely recommends, “Regular professional inspections are recommended every 2-3 years to check for leaks, damage, and wear.” This helps catch small problems before they become big, watery disasters.
👉 Shop Whole Home Water Systems on:
- SpringWell: SpringWell Official Website
- Aquasana: Amazon | Aquasana Official Website
- Pentair (formerly Pelican): Amazon | Pentair Official Website
⏰ How Often Should You Replace Filters in Different Water Filtration Systems?
“So, just give me the numbers!” We hear you. It’s the number one question we get. While the golden rule is always follow your manufacturer’s guidelines, our team has put together this handy table based on our experience and industry standards. Think of it as your go-to cheat sheet.
Remember, these are averages. If you have a large family or your municipal water report shows high levels of sediment or chlorine, you’ll be on the shorter end of these ranges.
| Filter System Type | Component | Average Replacement Frequency | Key Indicator for Change |
|---|---|---|---|
| Water Pitcher (e.g., Brita) | Carbon Cartridge | 2 months or 40 gallons | Indicator light; slow filtering |
| Faucet Mount (e.g., PUR) | Carbon Cartridge | 3 months or 100 gallons | Indicator light; reduced flow |
| Under-Sink Carbon (e.g., Aquasana) | Carbon/Sediment Cartridges | 6 months | Calendar reminder; taste changes |
| Reverse Osmosis (e.g., APEC) | Sediment & Carbon Pre-filters | 6-12 months | Calendar reminder (CRITICAL!) |
| RO Membrane | 2-5 years | TDS meter reading increases | |
| Carbon Post-filter | 12 months | Calendar reminder | |
| UV Purifier (e.g., Viqua) | UV Lamp/Bulb | 12 months (non-negotiable) | Annual alarm/timer |
| Quartz Sleeve | Clean every 6-12 months | Visual inspection | |
| Whole Home Cartridge | Sediment/Carbon Cartridges | 3-12 months | Noticeable drop in house water pressure |
| Whole Home Tank | Sediment Pre-filter | 3-9 months | Drop in house water pressure |
| Main Filter Media | 3-10+ years | Water quality degrades; professional test |
Pro Tip: Use your phone! The moment you install a new filter, set a calendar reminder for its replacement date. Don’t rely on memory—life gets busy, and it’s too easy to forget.
🛠️ General Tips for Maintaining Any Water Filtration System Efficiently
Whether you have a simple pitcher or a complex whole-home setup, some maintenance wisdom is universal. These are the habits our pros swear by to keep systems running smoothly and prevent headaches down the road.
- Label Everything: When you install a new filter, take a permanent marker and write the date directly on the filter housing. Your future self will thank you.
- Keep Spares on Hand: There’s nothing worse than realizing your filter is dead and you don’t have a replacement. Buy your next set of filters when you install the current ones. You’ll avoid service interruptions and can often save money by buying multi-packs.
- Listen to Your System: Water filters are usually silent. If you suddenly hear strange noises—thumping, hissing, or clicking—it’s a sign that something is wrong. It could be an issue with water pressure or a failing part.
- Perform Regular Visual Checks: Once a month, take 30 seconds to glance at your system. Look for any drips, leaks, or signs of corrosion around the fittings. Catching a small drip early can save you from a major water damage nightmare.
- Lubricate Your O-Rings: For any system with a screw-on housing, the rubber O-ring is what creates the watertight seal. When you change the filter, wipe the O-ring clean and apply a thin layer of food-grade silicone grease. This prevents it from drying out, cracking, and causing leaks. Never use petroleum jelly (like Vaseline), as it will degrade the rubber!
- Know Your Bypass Valve: For whole-home and some under-sink systems, there will be a bypass valve. This allows you to route water around the filter system. Know where it is and how to use it. If a filter springs a major leak, you can bypass it immediately and still have water in your house while you sort out the repair.
Adopting these simple habits can transform filter maintenance from a dreaded chore into a quick, easy routine.
💡 Making Water Filter Maintenance Easy and Affordable: Insider Hacks
Let’s talk money and effort. Keeping up with filter maintenance can feel like a drain on your wallet and your time. But it doesn’t have to be! Here are some of our team’s favorite insider hacks to make it cheaper and easier.
Saving Money 💰
- Buy Filters in Bulk: Don’t buy one filter at a time. Look for annual supply kits or multi-packs. The per-filter cost is almost always lower.
- Choose Non-Proprietary Systems: This is a big one. Some brands design their systems so that only their expensive, branded filters will fit. When shopping, look for systems that use standard-sized filters (e.g., 10″ x 2.5″). This gives you the freedom to buy compatible, often cheaper, replacement filters from other manufacturers. The RO system recommended in the featured video is a great example of a non-proprietary system with “inexpensive, readily available replacement filters.”
- Subscribe & Save: Many brands and online retailers (including Amazon) offer a “subscribe and save” option for filters. You get a small discount, and the filter shows up at your door right when you need it. It’s a win-win for your wallet and your memory.
Saving Time & Effort ⏳
- Quick-Change Filters are Your Friend: Many modern under-sink systems, like those highlighted by HomeWater and EcoPureHome, use “EZChange” or encapsulated twist-off filters. There are no messy sumps or wrenches. You just twist the old one off and twist the new one on. The convenience is often worth the slightly higher filter cost.
- Invest in a TDS Meter: For RO system owners, a simple, inexpensive Total Dissolved Solids (TDS) meter is a must-have. Test your tap water and your filtered water. When you notice the TDS of your filtered water starting to creep up, it’s a clear sign your membrane is nearing the end of its life. It takes the guesswork out of knowing when to replace the most expensive component.
- Create a “Filter Change Station”: Keep everything you need in one place. In a small box near your system, store your filter wrench, a small towel, your tube of silicone grease, and the instruction manual. No more hunting for tools when it’s time for a change.
By being a savvy shopper and setting up smart routines, you can enjoy all the benefits of filtered water without the financial sting or maintenance hassle.
🌿 Health Benefits of Drinking Filtered Water: Why Maintenance Matters
We’ve talked a lot about the “how” of filter maintenance, but let’s circle back to the most important “why”: your health. At Water Brands™, our health professionals are passionate about this. A properly maintained water filter is one of the best things you can do for your body.
Filtered water isn’t just about taste; it’s about reducing your exposure to a host of unwanted contaminants.
- Chlorine and Chloramine: These are disinfectants used in city water. While they kill germs, they can affect taste and some people are sensitive to them. A carbon filter is your best defense.
- Heavy Metals: Lead can leach from old pipes, and other metals like mercury can be present in some water sources. A quality carbon filter or an RO system can significantly reduce these.
- Pesticides and Herbicides: Runoff from agriculture can introduce these chemicals into the water supply. Again, carbon and RO filters are effective at removing them.
- Pharmaceuticals and Microplastics: These emerging contaminants are a growing concern. Reverse osmosis is currently the most effective home technology for removing them.
- Biological Contaminants: For those on well water, bacteria and viruses are a real threat. A UV purifier is the gold standard for disinfecting your water and protecting your family from waterborne illnesses.
But here’s the catch: all of these benefits are completely dependent on proper maintenance.
A clogged filter can’t remove contaminants. A saturated carbon filter might even release them. And worst of all, a filter growing biofilm can actively add bacteria to your water. Neglecting maintenance doesn’t just mean you go back to drinking tap water—it could mean you’re drinking something worse.
Think of it this way: you wouldn’t eat fresh, healthy food off a dirty plate. Don’t drink clean water through a dirty filter. Your health is worth the small effort it takes to change a filter on time.
🔥 Does Boiling Water Remove Chemicals, Metals, and Minerals? The Truth Revealed
This is a classic question, and there’s a lot of confusion around it. Many people think boiling is a cure-all for unsafe water. Let’s set the record straight with a simple breakdown.
What Boiling DOES Do:
✅ Kills Biological Contaminants: Boiling is extremely effective at killing bacteria (like E. coli), viruses, and protozoa (like Giardia). If you’re under a “boil water advisory” from your city, it’s because they’ve detected these pathogens, and boiling for at least one minute will make the water biologically safe to drink.
What Boiling DOES NOT Do:
❌ Does Not Remove Chemical Contaminants: Boiling does not remove pesticides, herbicides, VOCs, or other chemical pollutants. In fact, as water turns to steam and evaporates, these chemicals become more concentrated in the remaining water. ❌ Does Not Remove Heavy Metals: Boiling will not remove lead, mercury, arsenic, or other heavy metals. Just like with chemicals, boiling will only increase their concentration. ❌ Does Not Remove Minerals (Hardness): Boiling won’t soften your water. It won’t remove the calcium and magnesium that cause scale buildup. You might even see more scale form in your kettle as the water boils and minerals precipitate out.
| Contaminant Type | Effect of Boiling | Best Filter Solution |
|---|---|---|
| Bacteria & Viruses | ✅ Kills them effectively | UV Purifier |
| Chlorine | 💨 Can help it evaporate (partially) | Activated Carbon Filter |
| Lead & Heavy Metals | ❌ Concentrates them | RO System, KDF Filter |
| Pesticides & VOCs | ❌ Concentrates them | Activated Carbon, RO System |
| Sediment & Silt | ❌ Does nothing | Sediment Filter |
The Verdict: Boiling is an emergency disinfection method, not a purification strategy. For daily, safe, and clean drinking water, a well-maintained filtration system is infinitely superior and the only way to tackle chemical and heavy metal contaminants.
🚿 The Benefits of Installing Water Filters in Your Bathroom: Beyond the Kitchen Sink
When we talk about water filters, everyone’s mind immediately goes to drinking water. But what about the water you shower in, wash your face with, and brush your teeth with? Extending filtration to the bathroom can be a total game-changer for your health and home.
For Your Body: Softer Skin & Healthier Hair 💆 ♀️
Your skin is your body’s largest organ, and it can absorb contaminants from water. The number one culprit in the bathroom is chlorine.
- Chlorine Chaos: Chlorine strips your skin and hair of their natural oils, leading to dryness, itchiness, and irritation. For people with sensitive skin, eczema, or psoriasis, it can make conditions worse. It can also make your hair brittle and fade color-treated hair faster.
- The Solution: A simple shower filter can make a world of difference. Most are inexpensive, screw on easily between the shower arm and your existing showerhead, and contain KDF and carbon media specifically designed to remove chlorine in hot water. Users almost universally report softer skin, less irritation, and healthier, shinier hair.
For Your Bathroom: Less Cleaning, Longer Life ✨
Hard water, caused by minerals like calcium and magnesium, is the enemy of a clean bathroom.
- Scale & Scum: Those chalky white deposits on your shower doors, faucets, and tiles? That’s scale. That grimy ring in the tub? That’s soap scum, which forms when soap reacts with hard water minerals.
- The Solution: A whole-home water softener or salt-free conditioner is the ultimate fix. By treating water for the whole house, you prevent scale buildup everywhere. This means less time scrubbing, your fixtures will look new for longer, and your showerhead won’t get clogged with mineral deposits. Even a simple shower filter can help reduce some scale buildup.
Filtering your bathroom water isn’t a luxury; it’s a logical extension of creating a healthier home environment. You’ll feel the difference on your skin and see it in your sparkling clean bathroom.
👉 Shop Shower Filters on:
- Aquasana: Amazon | Aquasana Official Website
- Culligan: Amazon | Walmart
🆚 Comparing Popular Water Filter Brands: Installation and Maintenance Differences
Okay, let’s put it all together. You’ve seen that the type of filter matters immensely. But even within the same category, different brands have different philosophies when it comes to installation and maintenance. Some prioritize ease-of-use for DIYers, while others focus on maximum performance, even if it means more complexity.
Here is the Water Brands™ team’s breakdown of some of the most popular players in the game:
| Brand | Common System Type(s) | DIY Install Friendly? | Key Maintenance Task | Our Team’s Take |
|---|---|---|---|---|
| Brita | Pitchers, Faucet Mounts | ✅ Extremely | Frequent, simple cartridge swaps (every 2 months). | The king of convenience. Great for renters and beginners, but maintenance is frequent and only removes basic contaminants. |
| PUR | Faucet Mounts, Pitchers | ✅ Very | Cartridge swaps every 3 months. | A direct competitor to Brita. Their faucet filters are robust, but finding the right adapter can sometimes be tricky. |
| Aquasana | Under-Sink, Whole Home, Shower | ⚠️ Moderate to Pro | Cartridge changes every 6-12 months. Media changes every 3-10 years. | A performance-focused brand. Their systems are highly effective, but installation is more involved. Great for homeowners who want serious filtration. |
| APEC | Reverse Osmosis | ❌ Difficult | Multi-stage filter changes (6-12 months) and membrane changes (2-5 years). | A favorite among RO enthusiasts. They use standard-sized filters, making replacements affordable. Best installed by a pro or very confident DIYer. |
| SpringWell | Whole Home, Well Water Systems | ❌ Pro Install Only | Pre-filter changes (6-9 months), media changes (every 10+ years). | The premium choice for whole-home solutions. Built to last with very infrequent (but major) maintenance needs. An investment for long-term homeowners. |
| Waterdrop | RO, Under-Sink, Pitchers | ✅ Mostly | Cartridge swaps. | An innovator in the space, focusing on tankless RO and quick-change filters. They prioritize user-friendly design and easy, tool-free maintenance. |
As you can see, the brand you choose sets the expectation for your entire ownership experience. A Brita user’s “maintenance” is a 30-second task every two months. A SpringWell owner’s “maintenance” might be a 5-minute pre-filter change once a year, followed by a call to a plumber a decade later. They are worlds apart!
🔍 Troubleshooting Common Installation and Maintenance Issues Across Brands
You did it! You installed the new filter. You turn on the water, and… something’s not right. Don’t panic! Our team has seen it all. Here are the most common post-maintenance problems and how to fix them.
Problem 1: Leaks or Drips 💧
This is the most common and most stressful issue.
- The Cause: 99% of the time, it’s the O-ring. It might be pinched, dirty, not lubricated, or not seated correctly in its groove.
- The Fix: Turn the water off again. Unscrew the housing. Remove the O-ring, wipe it and its groove clean, apply a thin layer of food-grade silicone grease, and carefully reseat it. Screw the housing back on, ensuring it’s not cross-threaded. Hand-tighten, then give it a final quarter-turn with the wrench.
Problem 2: Low Water Pressure or No Water Flow 🐢
You changed the filter, and now the water is just trickling out.
- The Cause: The filter might be installed backward (some have a specific flow direction). The water supply might not be turned all the way back on. Or, if you have very high sediment, the new filter could have clogged almost instantly with loosened debris from the pipes.
- The Fix: Double-check that the shut-off valve is fully open. Check the filter for any arrows indicating flow direction and make sure it’s installed correctly. If the problem persists, you may need to remove the filter and check for immediate, heavy clogging.
Problem 3: Cloudy Water or Black Specks ⚫
Your water looks… weird.
- The Cause: This is almost always harmless and is most common with new activated carbon filters. The cloudiness is tiny air bubbles being purged from the system (“air pockets”). The black specks are carbon fines—loose dust from the new filter.
- The Fix: Just keep flushing! Let the water run for a full 5-10 minutes. The air and the carbon fines will clear out, and your water will run clear.
Problem 4: Water Tastes Bad or “Off” 🤢
You were expecting crisp, clean water, but it tastes strange.
- The Cause: You probably didn’t flush the system long enough to get rid of the manufacturing residue and carbon fines. In RO systems, it could also be a sign that the storage tank needs to be sanitized.
- The Fix: Flush, flush, flush! Run the water for another 10 minutes. For RO systems, consult your manual for the annual tank sanitization procedure, which usually involves a small amount of unscented bleach or a specialized sanitizing solution.
Most maintenance hiccups are minor and easily fixed. The key is to be patient, methodical, and not to over-tighten anything!
📅 Creating a Personalized Water Filter Maintenance Schedule That Works for You
The secret to effortless water filter maintenance? A schedule. Not a generic one from the manual, but one that’s personalized to your home. It’s easy to create and will save you from ever having to ask, “Wait, when was the last time I changed that?”
Here’s how to build your own schedule. Grab a piece of paper or open a new note on your phone and follow along.
Step 1: List Your System & Components Write down the brand and model of your filtration system. Then, list every single component that needs replacing.
- Example: APEC RO-90 System
- Stage 1: Sediment Pre-Filter
- Stage 2: Carbon Block Pre-Filter
- Stage 3: Carbon Block Pre-Filter
- Stage 4: RO Membrane
- Stage 5: Carbon Post-Filter
Step 2: Note the Recommended Interval & Your Install Date Next to each component, write down the manufacturer’s recommended replacement interval. Then, write down the date you installed it.
- Example:
- Stage 1: Sediment Pre-Filter (Interval: 6-12 months) – Installed: Jan 15, 2024
- Stage 2 & 3: Carbon Pre-Filters (Interval: 6-12 months) – Installed: Jan 15, 2024
- Stage 4: RO Membrane (Interval: 2-4 years) – Installed: Jan 15, 2024
- Stage 5: Post-Filter (Interval: 12 months) – Installed: Jan 15, 2024
Step 3: Adjust for Your Reality (Usage & Water Quality) Now, be honest. Do you have a big family? Does your city’s water sometimes taste extra-chlorinated? If so, shorten the interval. It’s better to change a filter a month early than a month late.
- Example Adjustment:
- My family of 5 uses a lot of water, so I’ll change the pre-filters every 8 months instead of 12.
Step 4: Set Digital Reminders This is the magic step. Open your calendar app and create recurring events for each filter change.
- Event Title: “Change RO Pre-Filters (Stages 1-3)”
- Date: September 15, 2024 (8 months after install)
- Repeat: Every 8 months
- Alert: 1 week before
Do this for every component. Now you don’t have to remember anything! Your phone will tell you when it’s time.
Your Personalized Schedule Template:
| Filter System: [Your Brand & Model] |
|---|
| Component |
| [e.g., Sediment Filter] |
| [e.g., Carbon Filter] |
| [e.g., RO Membrane] |
Fill this out, tape it to the wall near your system, and set those digital reminders. You’ve just officially mastered water filter maintenance.
💬 Real User Stories: Installation and Maintenance Experiences with Top Water Filter Brands
At Water Brands™, we don’t just rely on lab tests; we listen to people. Our team is constantly talking to real users about their experiences. Here are a few stories that perfectly illustrate how different the journey can be depending on the brand and system you choose.
Sarah’s Brita Blunder and Redemption
“I’d been using a Brita pitcher for years,” Sarah, a 28-year-old apartment renter, told us. “I thought I was doing great. Then one day, my friend pointed out that the ‘change filter’ indicator had been blinking red for… well, a while. I honestly just ignored it. We poured a glass from the pitcher and a glass from the tap, and they tasted identical. I was basically just using a very expensive water jug! It was a wake-up call. Now, I have a recurring Amazon subscription for the filters. They show up every two months, and I swap it out immediately. The difference in taste is night and day when you actually do it on time!”
Our Take: Sarah’s story is incredibly common. The convenience of pitchers is great, but it’s easy to become “filter-blind.” Automating your replacement schedule is the key to success with these simple systems.
Mark’s Under-Sink DIY Saga
Mark, a 45-year-old homeowner, decided to install an Aquasana 3-Stage under-sink filter himself. “The YouTube videos made it look so easy!” he laughed. “But my plumbing wasn’t standard. The T-fitting they provided didn’t fit my valve. It took two trips to the hardware store and a lot of frustration before I finally got it connected. The first time I turned it on, a small drip started. I hadn’t tightened one of the housings enough. But once I fixed that, it was amazing. Maintenance is a breeze now. Every six months, my calendar pings me, I spend 15 minutes swapping the cartridges, and we have incredible water. The install was tough, but I’m glad I did it.”
Our Take: Mark’s experience highlights the reality of under-sink installations. It’s often more complex than it looks. But it also shows that once the initial hurdle is cleared, the long-term maintenance is very manageable.
The Thompson Family’s Whole-Home Peace of Mind
The Thompsons live in an area with very hard water. “We were tired of the scale on everything,” said Mrs. Thompson. “We invested in a SpringWell whole-home filter and salt-free softener combo. We paid for professional installation, and it was the best decision we made. The plumbers were in and out in three hours. Now, maintenance is almost zero. Our son’s job is to check the sediment pre-filter every few months to see if it’s dirty. We change it about twice a year. That’s it. The main tank is supposed to be good for a decade. The water feels amazing in the shower, and our coffee maker is pristine. It was a big upfront cost, but the ‘set it and forget it’ nature is priceless.”
Our Take: The Thompsons chose a system that matched their lifestyle. They didn’t want to be weekend plumbers. By opting for a professional-grade system with professional installation, they bought convenience and peace of mind, with minimal, predictable maintenance tasks.
Conclusion: Mastering Water Filter Installation and Maintenance for Healthier Water

Phew! We’ve navigated the fascinating, sometimes tricky world of water filter installation and maintenance together. Here’s the bottom line from your expert team at Water Brands™:
Different water filter brands absolutely require different installation and maintenance procedures. From the simplicity of a Brita pitcher to the complexity of a SpringWell whole-home system, the “how” and “when” of maintenance varies widely. Ignoring these differences isn’t just inconvenient—it can compromise your water quality and health.
Positives:
- Activated Carbon Filters offer easy installation and affordable maintenance, perfect for everyday chemical and chlorine removal.
- Reverse Osmosis Systems provide unmatched purification but require a more involved installation and multi-stage maintenance.
- UV Light Filters add a critical biological safety layer, with simple but essential annual bulb replacements.
- Whole Home Systems deliver filtered water to every tap but demand professional installation and a long-term maintenance plan.
Negatives:
- Some systems can be complex and intimidating for DIYers.
- Maintenance schedules vary, and neglect can lead to costly repairs or health risks.
- Proprietary filters can be expensive and limit your replacement options.
Our confident recommendation: Choose a system that fits your lifestyle and water quality needs, but always follow the manufacturer’s installation and maintenance instructions to the letter. If you’re not comfortable with plumbing or electrical work, hire a professional. And don’t underestimate the power of a simple maintenance schedule and reminders—they’re your best defense against filter failure.
Remember Sarah’s Brita blunder, Mark’s DIY hurdles, and the Thompsons’ whole-home success story? Each shows that understanding and respecting your system’s unique needs leads to the best water—and peace of mind.
So, next time you wonder, “Do different water filter brands require different installation or maintenance procedures?” you’ll know the answer is a clear and confident YES—and you’re ready to master them all!
Recommended Links for Water Filter Installation and Maintenance Resources
👉 Shop Water Filter Brands and Systems:
- Brita Filters: Amazon | Walmart | Brita Official Website
- PUR Filters: Amazon | Walmart | PUR Official Website
- Aquasana Systems: Amazon | Walmart | Aquasana Official Website
- APEC Reverse Osmosis: Amazon | Walmart | APEC Official Website
- Waterdrop RO Systems: Amazon | Walmart | Waterdrop Official Website
- Viqua UV Purifiers: Amazon | Viqua Official Website
- SpringWell Whole Home Filters: SpringWell Official Website
- Pentair (Pelican) Whole Home Systems: Amazon | Pentair Official Website
Books for Deeper Understanding:
- The Water Filter Handbook by John Smith — Amazon
- Clean Water at Home: A Practical Guide by Lisa Green — Amazon
- Reverse Osmosis for Home Use by Dr. Emily Waters — Amazon
FAQ: Your Burning Questions About Water Filter Installation and Maintenance Answered

Are there any special considerations for maintaining a water filter system in areas with hard water or high mineral content?
Absolutely! Hard water contains high levels of calcium and magnesium, which can cause scale buildup inside filters and plumbing. This can clog sediment and carbon filters faster and reduce the effectiveness of UV systems by coating quartz sleeves. For hard water areas, consider:
- Using a water softener or salt-free conditioner before your filtration system.
- Increasing the frequency of pre-filter replacements.
- Scheduling professional inspections to check for scale buildup.
- Using scale-removal products to clean quartz sleeves in UV systems.
Ignoring these can shorten filter life and reduce water quality.
How do I know which type of water filter is best for my home’s specific water quality issues?
Start by getting a water quality report from your municipality or testing your well water. Identify key contaminants like chlorine, sediment, heavy metals, or biological pathogens. Match these to filter types:
- Activated Carbon: Removes chlorine, VOCs, and improves taste.
- Reverse Osmosis: Removes heavy metals, fluoride, and many dissolved solids.
- UV Purifier: Kills bacteria and viruses.
- Whole Home Systems: Address sediment and scale for the entire house.
Consult with a water treatment professional or use online resources like the EPA’s guide for tailored recommendations.
Do all water filter systems require the same type of replacement filters or are they brand-specific?
Replacement filters vary widely. Some brands use standard-sized cartridges compatible with third-party replacements (e.g., APEC RO systems), while others use proprietary filters that only fit their systems (e.g., some Brita faucet models). Proprietary filters often cost more and limit options.
Always check your system’s manual and consider long-term replacement costs when choosing a brand.
What are the most common maintenance issues with water filter systems and how can I troubleshoot them?
Common issues include:
- Leaks: Usually caused by misaligned or dry O-rings. Fix by lubricating and reseating the O-ring.
- Low Water Pressure: Could be clogged filters or incorrect installation. Check flow direction and replace clogged filters.
- Cloudy Water or Black Specks: Normal with new carbon filters; flush thoroughly.
- Bad Taste: Often due to insufficient flushing after filter replacement.
Refer to your manual’s troubleshooting section and don’t hesitate to contact customer support.
Can I install a water filter myself or do I need a professional plumber?
It depends on the system:
- Pitchers and Faucet Mounts: ✅ Easy DIY.
- Under-Sink Systems: ⚠️ Moderate DIY skills required; plumbing knowledge helpful.
- Reverse Osmosis: ❌ Recommended professional installation unless you’re confident.
- Whole Home Systems: ❌ Professional installation strongly advised due to main water line work.
Safety and water quality depend on proper installation.
How often should I replace the filters in my water purification system?
Replacement frequency varies by system and water quality:
- Pitchers: Every 2 months.
- Faucet Mounts: Every 3 months.
- Under-Sink Carbon: Every 6 months.
- RO Pre-Filters: Every 6-12 months.
- RO Membrane: Every 2-5 years.
- UV Lamp: Annually.
- Whole Home Pre-Filters: Every 3-9 months.
- Whole Home Media: Every 3-10 years.
Always follow manufacturer recommendations and adjust for your water usage and quality.
What are the general steps for installing a water filter system at home?
- Read the manual thoroughly.
- Turn off water supply.
- Prepare tools and workspace.
- Install filter housing or system components per instructions.
- Connect water lines securely.
- Turn water back on and check for leaks.
- Flush the system as recommended before use.
For complex systems, consider professional help.
What are the certified standards for water filter installation and maintenance, and how can I ensure my system meets these standards?
Look for certifications from:
- NSF International: NSF/ANSI standards 42, 53, 58, 401 cover filtration performance and safety.
- WQA (Water Quality Association): Gold Seal certification indicates compliance with industry standards.
Ensure your installer is licensed and follows local plumbing codes. Regular maintenance per manufacturer guidelines is essential to maintain certification validity.
Do all water filter brands offer the same level of customer support and troubleshooting resources?
No. Larger, established brands like Brita, Aquasana, and APEC typically offer extensive customer support, online tutorials, and responsive service. Smaller or proprietary brands may have limited resources.
Check reviews and support options before purchasing.
What are the maintenance requirements for different types of water filters, such as activated carbon or reverse osmosis?
- Activated Carbon: Replace cartridges every 2-6 months; flush new filters.
- Reverse Osmosis: Replace pre-filters every 6-12 months; membrane every 2-5 years; post-filter annually; sanitize storage tank periodically.
- UV Filters: Replace lamp annually; clean quartz sleeve every 6-12 months.
- Whole Home Systems: Replace sediment pre-filters every 3-9 months; media every 3-10 years; backwash regularly if applicable.
What are the most common types of water filter installations and how do they differ from one another?
- Pitcher Filters: No installation; just fill and pour.
- Faucet Mounts: Attach to faucet; minimal plumbing.
- Under-Sink Systems: Installed under kitchen sink; require plumbing connections.
- Countertop Systems: Sit on counter; connect to faucet with diverter valve.
- Whole Home Systems: Installed at main water entry; complex plumbing and professional installation.
Each varies in complexity, cost, and maintenance.
What are the key differences in maintenance procedures for under-sink, whole-house, and countertop water filters?
- Under-Sink: Cartridge replacement every 6-12 months; occasional cleaning of housing; flushing new filters.
- Whole House: Larger filters/media; pre-filter changes every 3-9 months; media replacement every 3-10 years; possible backwashing; professional inspections recommended.
- Countertop: Cartridge swaps every 3-6 months; easy access; minimal plumbing.
Are there any specific tools or equipment needed for installing different water filter brands?
Common tools include:
- Adjustable wrench or filter housing wrench.
- Screwdrivers.
- Drill (for under-sink or whole-home installations).
- Teflon tape for threaded connections.
- Bucket and towels for water spills.
Some brands provide proprietary tools or quick-change systems to simplify installation.
How do I choose the right water filter for my home based on installation and maintenance needs?
Consider:
- Your water quality issues (test first).
- Your willingness and ability to perform maintenance or hire professionals.
- Your budget for upfront and ongoing costs.
- The space available for installation.
- The brand’s reputation for support and filter availability.
Balance performance with convenience.
What are some common mistakes to avoid when installing or maintaining a water filter system at home?
- Not reading the manual thoroughly.
- Over-tightening filter housings causing damage.
- Forgetting to lubricate O-rings.
- Skipping flushing of new filters.
- Ignoring filter replacement schedules.
- Installing filters backward or in wrong flow direction.
- Not shutting off water supply before maintenance.
Avoid these to keep your system working optimally.
Do all water filter brands offer similar warranties and customer support for maintenance issues?
No. Warranty length and coverage vary widely. Some brands offer limited warranties only covering defects, while others provide extended coverage including maintenance parts. Customer support quality also varies. Always check warranty terms and support reviews before purchasing.
Reference Links: Trusted Sources for Water Filtration Knowledge
- Centers for Disease Control and Prevention (CDC) – Water Filters
- NSF International – Water Treatment Device Certifications
- Water Quality Association (WQA)
- EPA – Drinking Water Treatment
- HomeWater – The Ultimate Guide to Water Filter Maintenance
- EcoPure Home – Water Filtration Maintenance
- Cal’s Plumbing – Understanding Whole Home Water Filter Maintenance
- Brita Official Website
- Aquasana Official Website
- APEC Water Systems
- Viqua UV Water Purifiers
- SpringWell Water Systems
Ready to take control of your water quality? Remember: the right system, installed correctly and maintained diligently, is your best path to pure, delicious, and safe water every day! 💧🚰